What are Stable Diffusion models & how to use different models in Automatic1111
What are Stable Diffusion models & how to use different models in Automatic1111

Bringing the latest tech to grow your business. AWS, GCP & Azure registered partner and cloud solution provider on latest tech.
Introduction
Pre-trained Stable Diffusion weights, also known as checkpoint files, are models designed for generating images of a general or specific genre.
What images a model can generate depends on the data used to train them. A model won’t be able to generate a horse image if there’s never a horse in the training data. Likewise, if you only train a model with horse images, it will only generate horses.
In this article, we will introduce what models are, discuss some common ones, and provide step-by-step instructions on how to install a new model, as well as how to use and merge them.
Fine-tuned models
What is fine-tuning?
Fine-tuning is a common technique in machine learning. It takes a model that is trained on a wide dataset and trains a bit more on a narrow dataset.
A fine-tuned model will be biased toward generating images similar to your dataset while maintaining the versatility of the original model.
Why do we need to fine-tune models?
Although stable diffusion has its advantages, it may not excel in every scenario. While it can easily produce anime-style images by using the “anime” keyword in the prompt, generating images of a specific sub-genre within anime may pose a challenge. Instead of trying to modify the prompt to achieve this, a better approach would be to fine-tune the model using images from the desired sub-genre.
What are the methods used to fine-tune a model?
There are two primary techniques for fine-tuning, namely, additional training and using Dreambooth extension, both of which begin with a base model such as Stable Diffusion v2.1 or v1.5.
Additional training involves training a base model with an additional dataset of interest. For instance, one can train Stable Diffusion v2.1 with a supplementary dataset of vintage cars to introduce a bias towards this sub-genre in car aesthetics.
Dreambooth, which was initially developed by Google, is a method for integrating custom subjects into text-to-image models. It requires only 3–5 custom images to function and can be used to incorporate personal images into the model. To condition the model, a unique keyword is needed for the model trained with Dreambooth. For more details on how to use Dreambooth for fine-tuning, please refer to our other article, which talks about Dreambooth in detail.
Models
There are two groups of models: v1 and v2. I will cover the v1 models in this section and the v2 models in the next section.
There are thousands of fine-tuned Stable Diffusion models. The number is increasing every day. Below is a list of models that can be used for general purposes.
Stable diffusion v1.4
Model Download link
Released in August 2022 by Stability AI, the v1.4 model is considered to be the first publicly available Stable Diffusion model.
You can treat v1.4 as a general-purpose model. Most of the time, it is enough to use it as is unless you are really picky about certain styles.
Stable diffusion v1.5
Model Download link
v1.5 is released in Oct 2022 by Runway ML, a partner of Stability AI. The model is based on v1.2 with further training.
Like v1.4, you can treat v1.5 as a general-purpose model.
v2 models
Stability AI released a new series of models version 2. So far 2.0 and 2.1 models are released. The main change in v2 models are
In addition to 512×512 pixels, a higher resolution version of 768×768 pixels is available.
You may assume that everyone has moved on to using the v2 models. However, the Stable Diffusion community found that the images looked worse in the 2.0 model. People also have difficulty using powerful keywords like celebrity names and artist names.
The 2.1 model has partially addressed these issues. The images look better out of the box. It’s easier to generate artistic style.
As of now, most people have not completely moved on to the 2.1 model. Many use them occasionally but spend most of the time with v1 models.
If you decided to try out v2 models, be sure to check out these tips to avoid some common frustrations.
Step by Step guide on using Stable Diffusion models
Prerequisites
Note: Below steps are provided considering Stable Diffusion is installed on a Linux machine, you will need to make necessary changes such as directory path location if your environment is running on a Windows environment.
Once you have the Stable Diffusion & Automatic1111 setup running, the model files are required to be saved in STABLE_DIFFUSION_HOME_DIRECTORY/models/Stable-diffusion/
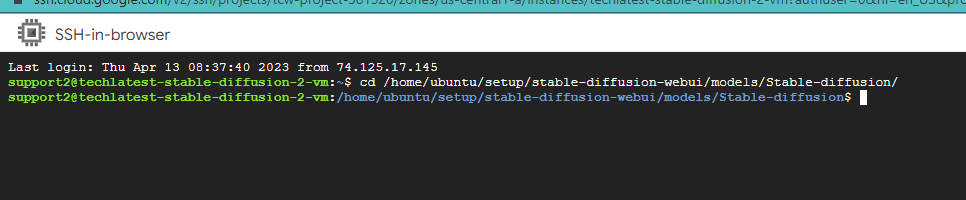
As shown below, in our environment the model directory location is /home/ubuntu/setup/stable-diffusion-webui/models/Stable-diffusion/
To install a model in AUTOMATIC1111 GUI, download and place the checkpoint (.ckpt) file in the model folder.
Hugging Face offers a variety of models to choose from, so you are free to select any of them and give them a try.
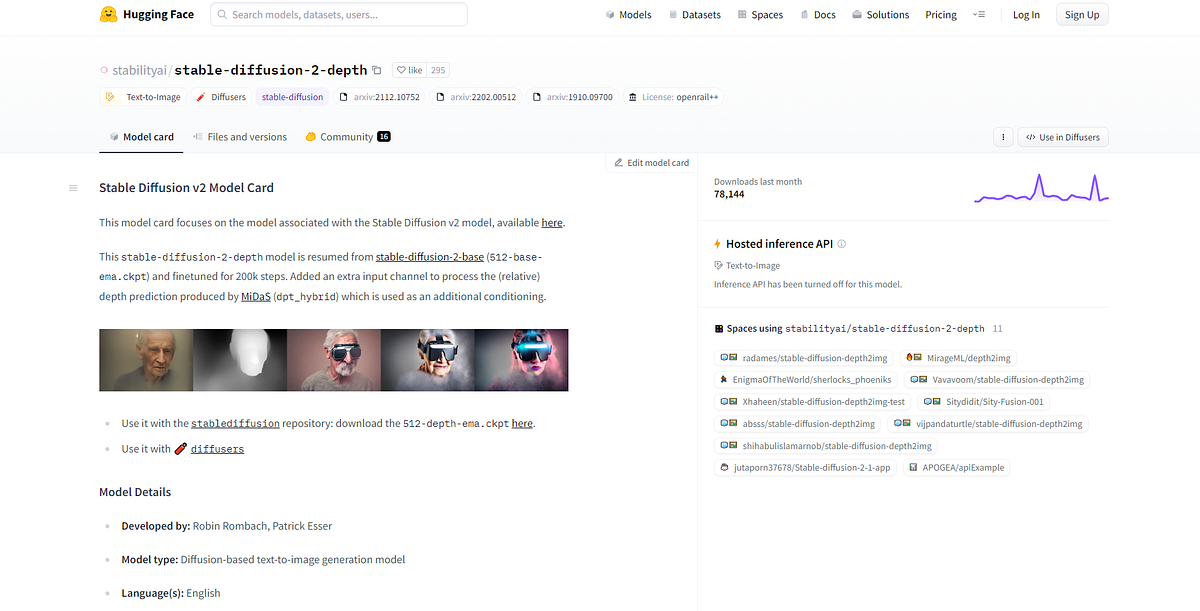
stabilityai/stable-diffusion-2-depth
For this demonstration purpose, I have used stabilityai/stable-diffusion-2-depth model which is available for download from here.
For installing the model and ckpt file, we have to use some commands, Let's start.
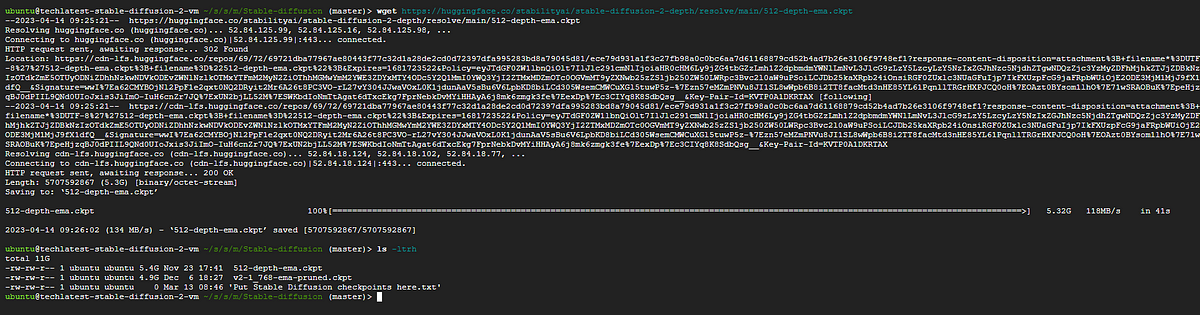
First, we run the sudo su ubuntu command to enter ubuntu on the terminal. After this command, we have gone into the directory using the cd command as shown in the below image.
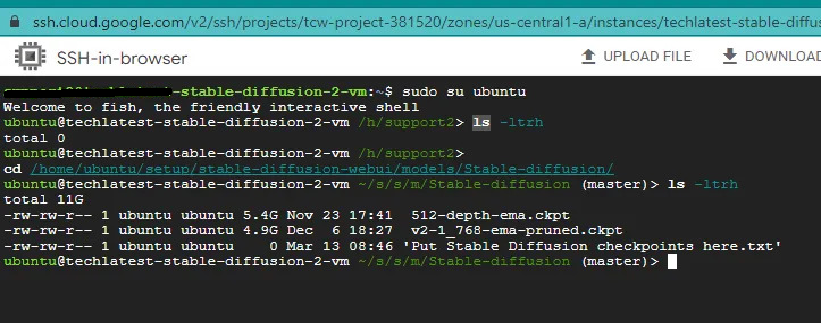
You can see in the above image using ls -ltrh command, we can check all the downloaded models.
After this, you can simply copy the ckpt file address from the hugging face. Right Click on the here button and copy the address.
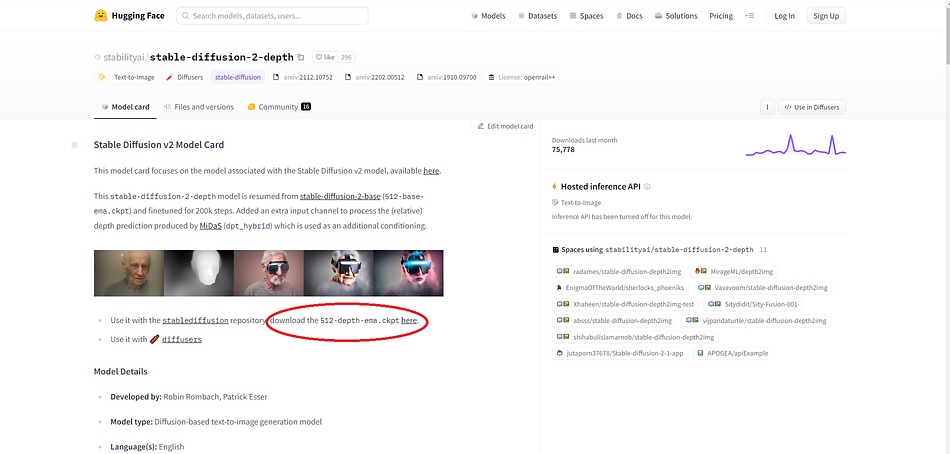
- After copying the address paste it to the terminal using the wget command this will download the ckpt file with the model.
Once you downloaded the checkpoint model file in the checkpoint directory, restart your Stable Diffusion environment.
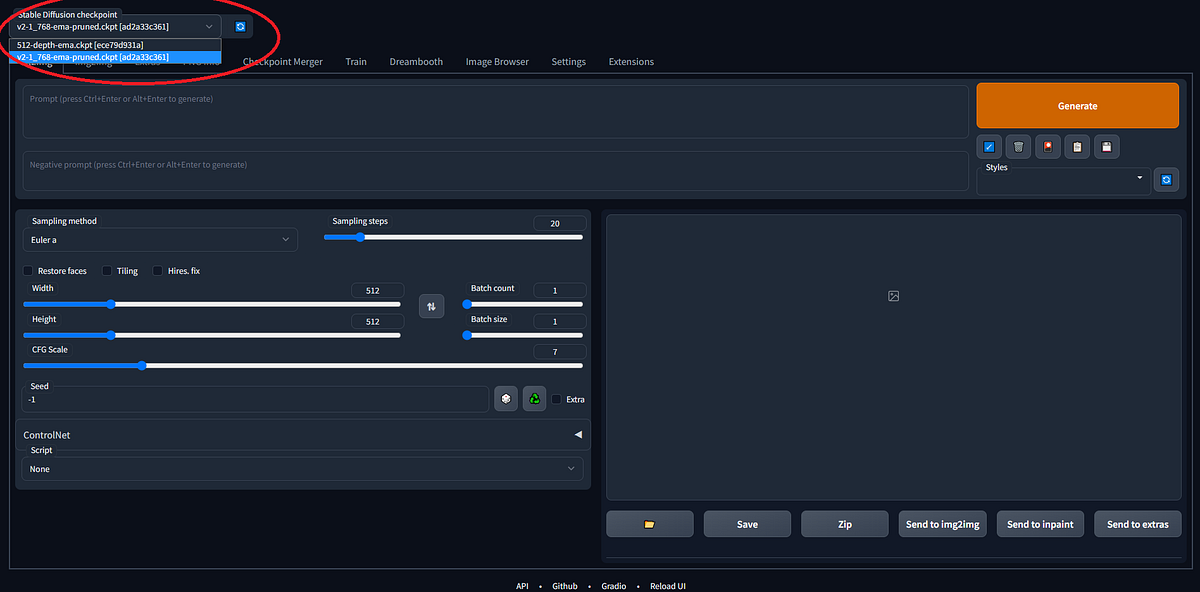
Once the environment is restarted, open the Automatic1111 web interface and press reload button next to the checkpoint dropdown in the top left corner.

- You should see the name of the newly downloaded checkpoint model file. Select the new checkpoint file to use the model.
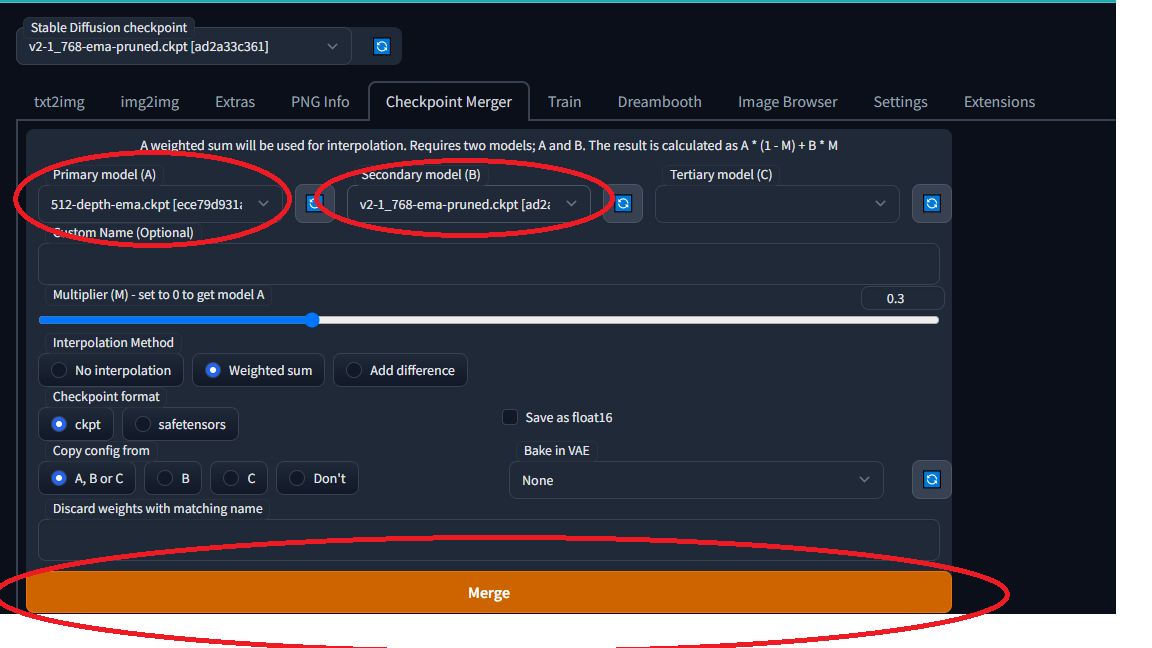
Merging two models
- To merge two models using AUTOMATIC1111 GUI, go to the Checkpoint Merger tab.

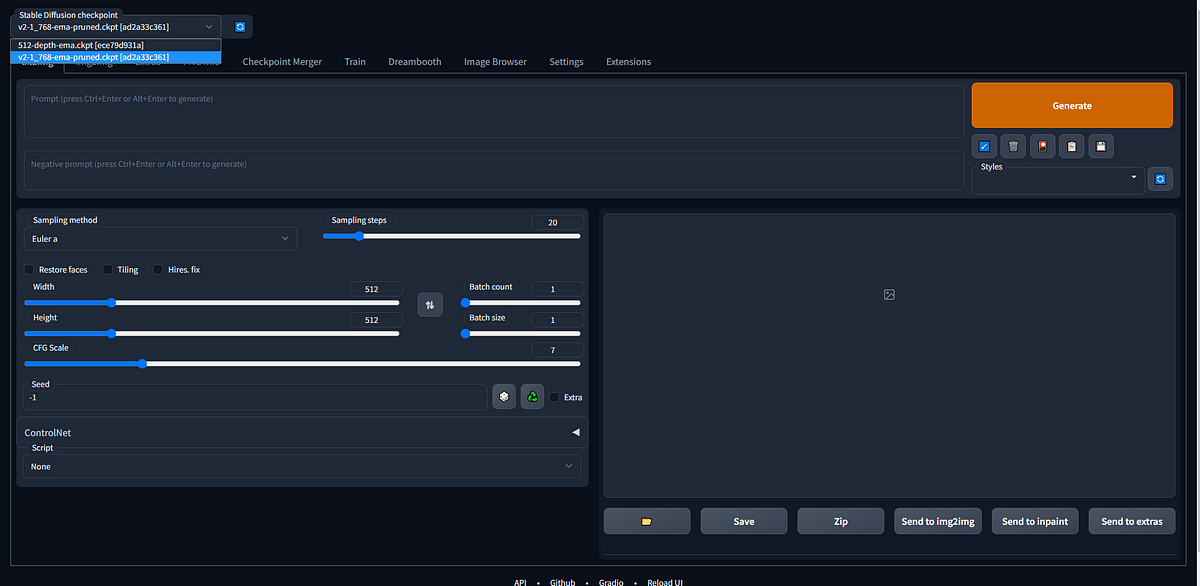
- In the below image, you can see the two models in the Stable Diffusion checkpoint tab.
- And select the two models you want to merge in the Primary model (A) and the Secondary model (B).
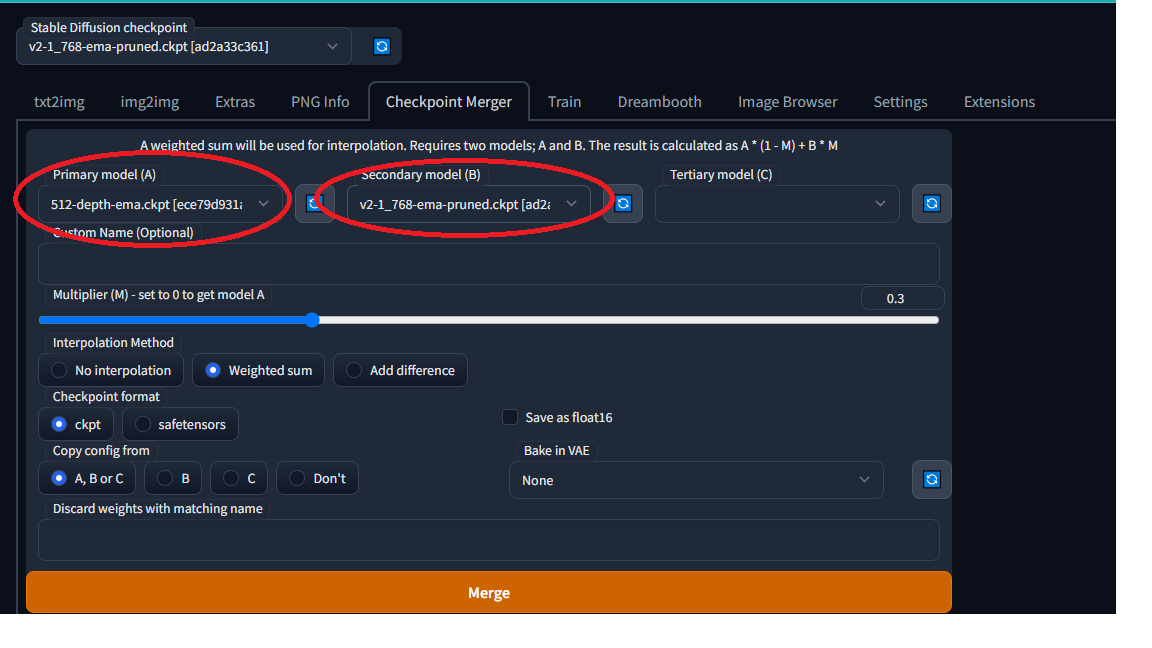
- And after selecting the two models, click on the merge button, this gives you the final output.
Other model types
Four main types of files can be called “models”. Let’s clarify them, so you know what people are talking about.
Checkpoint models: These are the real Stable Diffusion models. They contain all you need to generate an image. No additional files are required. They are large, typically 2–7 GB. They are the subject of this article.
Textual inversions: Also called embeddings. They are small files defining new keywords to generate new objects or styles. They are small, typically 10–100 KB. You must use them with a checkpoint model.
LoRA models: They are small patch files to checkpoint models for modifying styles. They are typically 10–200 MB. You must use them with a checkpoint model.
Hypernetworks: They are additional network modules added to checkpoint models. They are typically 5–300 MB. You must use them with a checkpoint model.
Conclusion
In conclusion, this blog post serves as a useful guide for those seeking to learn about pre-trained Stable Diffusion weights or checkpoint files, which are used for generating images. The type of images a model can generate depends on the data used to train it. The article aims to introduce different models, explain how to install and use them, and also provide instructions on how to merge them.


