Stable Diffusion under the Hood: Prompt Engineering, Settings, and command line arguments
Stable Diffusion under the Hood: Prompt Engineering, Settings, and command line arguments

Bringing the latest tech to grow your business. AWS, GCP & Azure registered partner and cloud solution provider on latest tech.
Introduction
In this blog post, we aim to provide you with a brief guide on prompt engineering, fundamental settings AUTOMATIC1111, and command line arguments of Stable Diffusion. We will also cover the most significant parameters that you can utilize. We highly recommend experimenting with the parameters mentioned in this article to gain a better understanding of their functionality.
Firstly, we will discuss some basic settings in Stable Diffusion, after which we will walk through the most crucial command-line arguments of Stable Diffusion.
What is Stable Diffusion?
Stable Diffusion is a deep learning, text-to-image model released in 2022. It is primarily used to generate detailed images conditioned on text descriptions, though it can also be applied to other tasks such as inpainting, outpainting, and generating image-to-image translations guided by a text prompt.
What are Command line arguments in Stable Diffusion?
The script recognizes a series of command-line switches that will change important global defaults, such as the directory for image outputs and the location of the model weight files.
Some Basic settings in Stable Diffusion
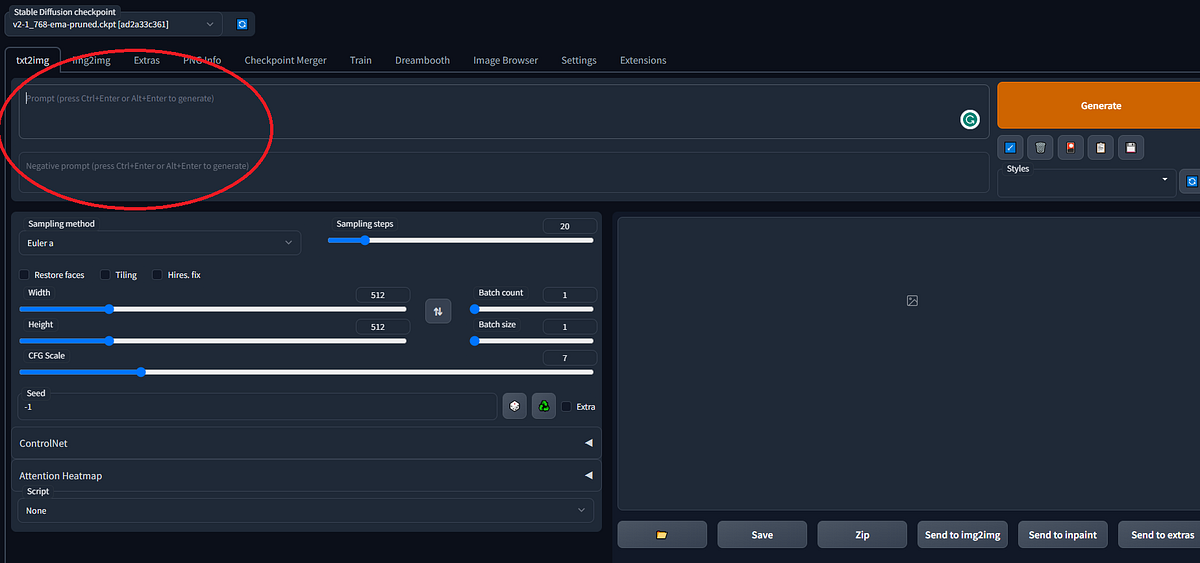
Prompt basics
Let’s first understand the structure of a prompt.
(subject)(style), (action/scene), (artist), (filters)
Following this basic rule, you will be able to generate some decent images.
(subject)
This is the basic building block of any prompt. The so-called raw prompt. Ex: a black horse.
(style)
Style is an essential component of the prompt. When a specific style is not specified, the AI typically selects the one it has encountered the most in related images. For instance, if a landscape is generated, the resulting images would likely be realistic or resemble oil paintings. Often, a well-selected style and raw prompt combination are sufficient since the style has the most significant influence on the image immediately following the raw prompt.
(action/scene)
The action describes what the subject is doing and the scene describes where. Example: jumping in the forest.
(filters)
Filters are an additional sauce that you can add to your prompt to achieve your desired look. For example, if you want to add an artistic touch to your image, you can include “trending on ArtStation” as a filter. Similarly, if you want to incorporate more realistic lighting, you can add “Unreal Engine” as a filter. While you have the freedom to be creative and add any filter you prefer, here are some examples:
Highly detailed, surrealistic, trending on art station, triadic colour scheme, smooth, sharp focus, matte, elegant, the most beautiful image ever seen, illustration, digital paint, dark, gloomy, octane render, 8k, 4k, washed colours, sharp, dramatic lighting, beautiful, post-processing, picture of the day, ambient lighting, epic composition
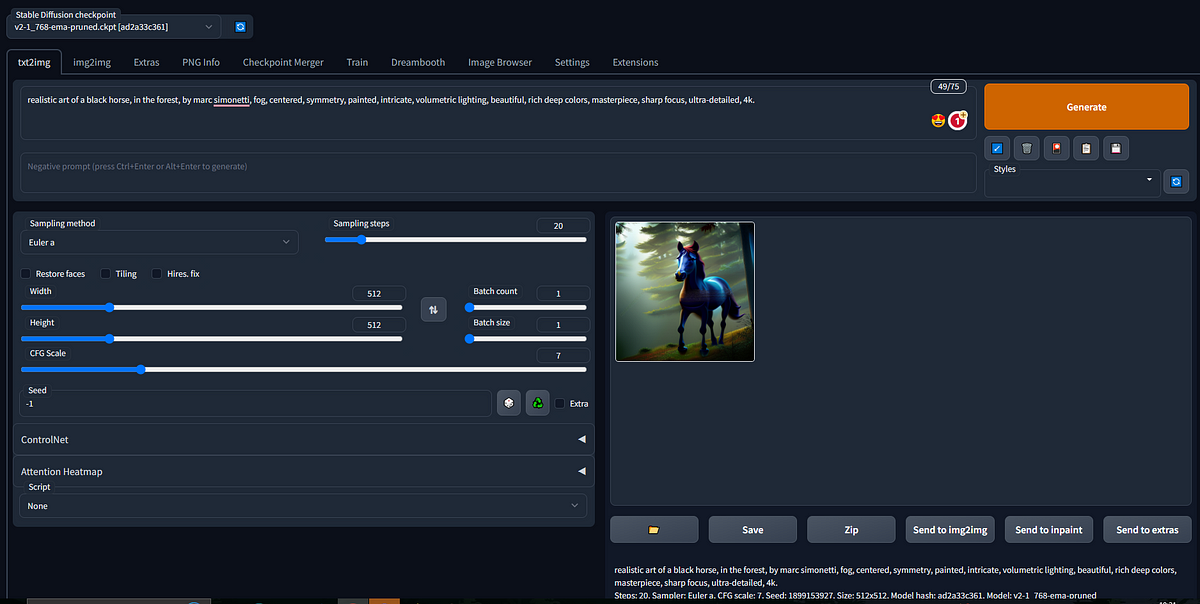
Here is the final example using this basic rule:
realistic art of a black horse, in the forest, by marc simonetti, fog, centred, symmetry, painted, intricate, volumetric lighting, beautiful, rich deep colours, masterpiece, sharp focus, ultra-detailed, 4k.
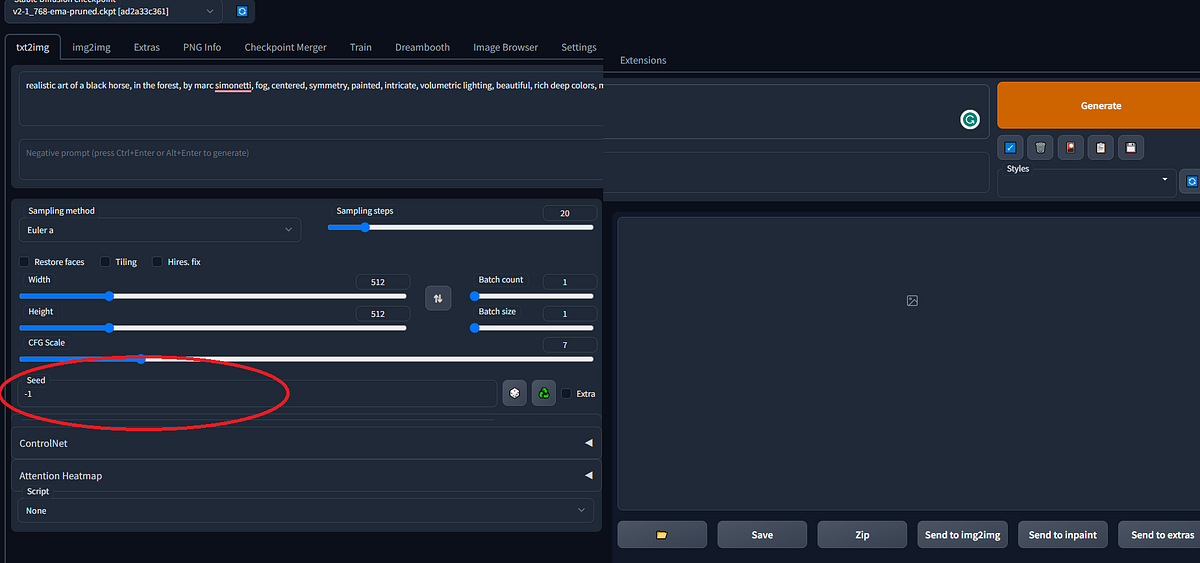
Seed
A seed is a specific region in the latent space of the Stable Diffusion Model. You can think of it as coordinates.
Stable Diffusion takes two primary inputs and translates these into a fixed point in its model’s latent space:
A seed integer
A text prompt
The same seed and the same prompt given to the same version of Stable Diffusion will output the same image every time. In other words, the following relationship is fixed:
seed + prompt = image
If your experiments with Stable Diffusion have resulted in you getting different images for the same prompt (and they probably have), it’s because you were using a random seed integer every time you submitted the prompt:
If you generate an image that you like you can specify the seed of it and tweak the prompt to have consistent variations of your original image. If you do not change the prompt you will get exactly the same results because of the fixed relationship between the prompt and seed.
Width & Height
This setting defines the aspect ratio of your images. While you are free to experiment with the width and height, it is important to note that Stable Diffusion is optimized for 512x512 dimensions. Changing this setting may significantly increase the generation time and memory consumption.
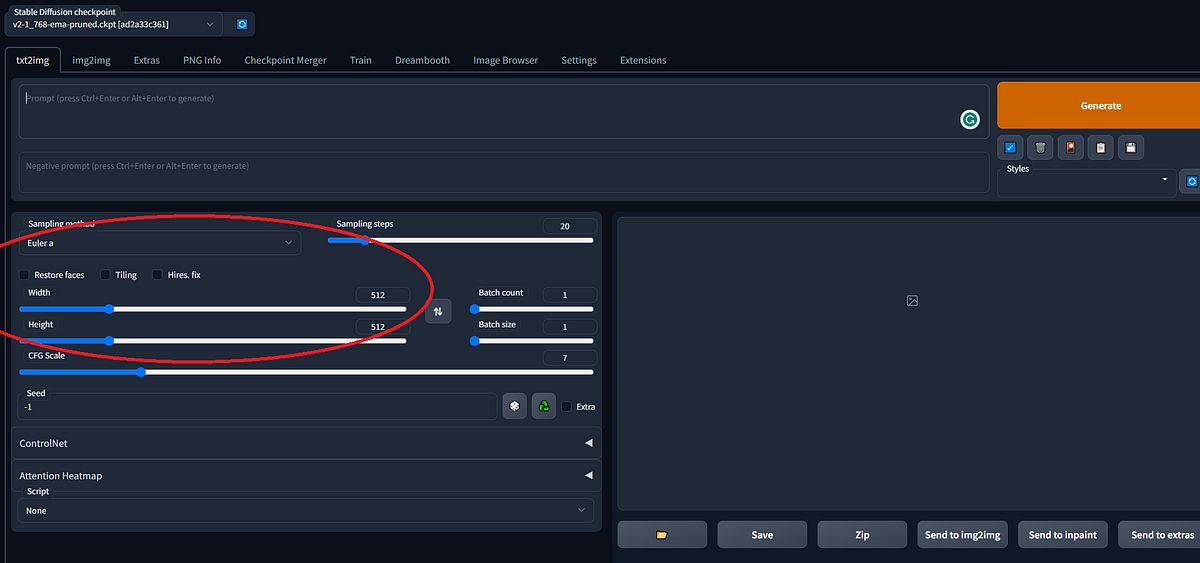
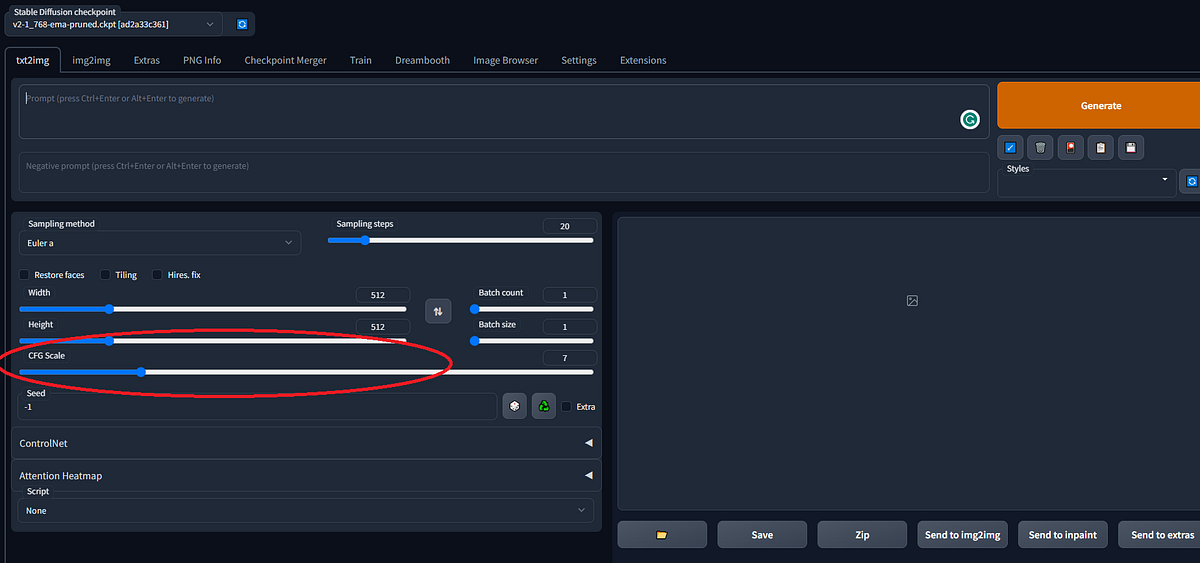
CFG Scale
Like Seed, the classifier-free guidance scale (CFG Scale) is one of the additional settings found in the Stable Diffusion model. The CFG scale adjusts how much the image looks closer to the prompt and/ or input image. If CFG Scale is greater, the output will be more in line with the input prompt and/or input image, but it will be distorted. On the other hand, the lower the CFG Scale value, the more likely it is to drift away from the prompt or the input image, but the better quality.
The value of the CFG scale and the fidelity between the prompt & output images are directly proportional to each other. The value of the CFG Scale and the quality of the output are inversely proportional to each other.
Let’s understand the CFG Scale functionality with an experiment. In this article, I’ll be using DreamStudio, Playground AI, and Lexica to show how the CFG Scale works. You can also use this article whether you are using Stable Diffusion on your local machine.
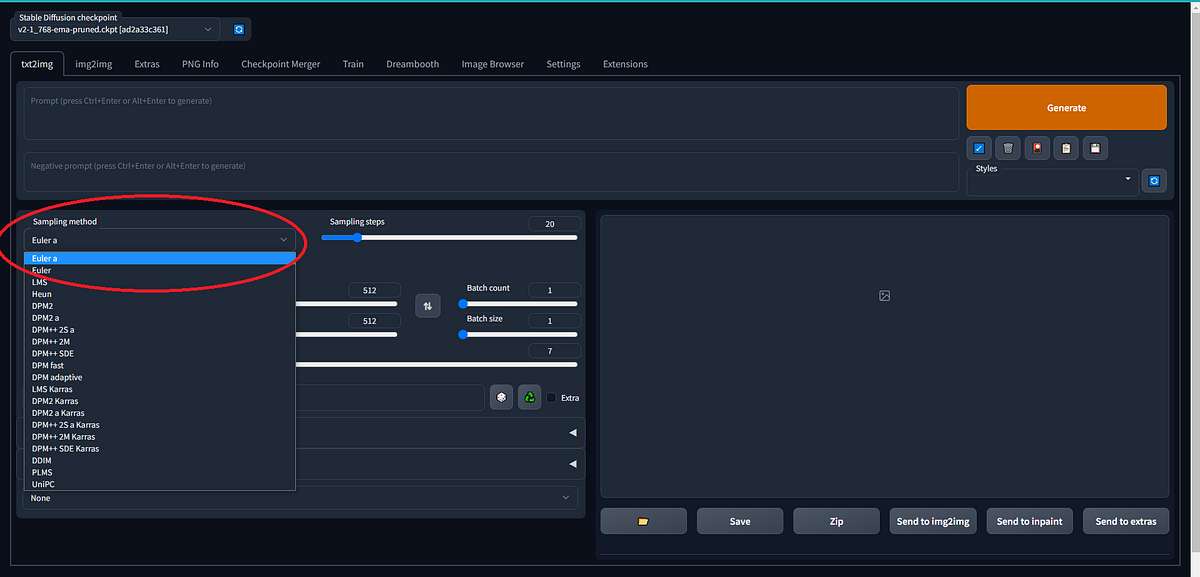
Sampler
A sampler determines how the image is calculated without going into the math, there's an input (prompt) and output (image) when dealing with these latent diffusion models, and the sampler “tells” influences the next steps. Since these samplers are different mathematically, they will diverge and can eventually converge if the settings are correct.
Now Let's Talk about the Command Line arguments
The Command line arguments we are going to discuss below are part of the launch.py file which is invoked by webui.bat(for Windows system) / webui.sh(for Linux system) script. These scripts are available in the Stable Diffusion home directory.
Below are some of the command line arguments with their description & use.
- -data-dir
The base path refers to the location where all user data is stored. It serves as the central directory for accessing and managing user data. This path is critical for ensuring efficient data retrieval and storage, as it provides a unified and organized approach to accessing user data. Therefore, choosing an appropriate base path is essential to ensure optimal performance and efficient data management.
- -config
The path to the configuration argument is crucial as it defines the specifications for constructing the model. This argument serves as a blueprint for the model, defining its architecture, hyperparameters, and other critical elements. Without the appropriate configuration file, the model may not perform optimally or may not work at all. Therefore, ensuring that the path to the configuration argument is accurate and accessible is vital for the successful construction and execution of the model.
- - ckpt
The path to the checkpoint of the Stable Diffusion model is a crucial element for loading and utilizing the model effectively. When specified, this checkpoint is added to the list of available checkpoints, allowing the user to select and load the appropriate model checkpoint for their desired task. This checkpoint contains valuable information about the model, including its architecture, trained weights, and other critical parameters. Therefore, ensuring that the correct path to the Stable Diffusion model checkpoint is specified is essential to ensure optimal performance and accuracy of the model.
- - ckpt-dir
The path to the directory containing the Stable Diffusion checkpoints is a critical component of accessing and managing the available checkpoints for the model. This directory serves as the central location for storing and organizing the various checkpoints for the model, allowing for easy access and selection of the appropriate checkpoint for the desired task. It is essential to ensure that the specified path to this directory is accurate and accessible to avoid any issues with loading or utilizing the checkpoints. Additionally, maintaining an organized and well-structured directory of checkpoints can improve the efficiency and effectiveness of the model.

- - lora-dir
In order to effectively utilize Lora networks, it is essential to provide the correct path to the directory where these networks are stored, which can be accomplished by specifying the parameter “lora-dir” and assigning it the appropriate directory path.
- - ui-settings-file
When configuring the user interface, it is important to specify the appropriate file name to be used for the UI settings, which can be achieved by setting the parameter “ui-settings-file” to the desired filename.
- - listen
Listen will launch Gradio with IP 0.0.0.0 which will make Gradio listen to other computers on the LAN. Then you can fire up the UI with the computer’s IP:7860 (or other port if you changed it) in a browser on any computer on the LAN.
- - port
When launching Gradio with a specified server port, it is important to note that certain privileges may be required to access ports below 1024. In most cases, root or admin rights are necessary to use ports in this range, which can be limiting when selecting a port number for the Gradio server. However, it is possible to specify a different port number to use when launching the Gradio server, which can help avoid conflicts with other services or applications that may be using the same port. It is also recommended to check for available ports and select a number that is not in use to ensure that the Gradio server can be accessed by users without any issues. By default, Gradio will attempt to use port 7860 if it is available, but this may not always be the best option depending on the specific requirements of the API and the availability of other ports. Therefore, careful consideration should be given to the selection of the server port when launching Gradio to ensure that the web UI can be accessed and utilized effectively by users.
- - api
Launching a web user interface (UI) with an API can provide a user-friendly and intuitive way to interact with the API’s features and functionality. By integrating the API with a web UI, users can access and utilize the API’s capabilities through a graphical interface, making it easier to understand and use the API’s features. Additionally, a web UI can provide enhanced functionality, such as real-time data visualization, drag-and-drop functionality, and other interactive features, that may not be available through a traditional command-line interface. Therefore, launching a web UI with an API can improve the user experience and increase the accessibility and usability of the API.
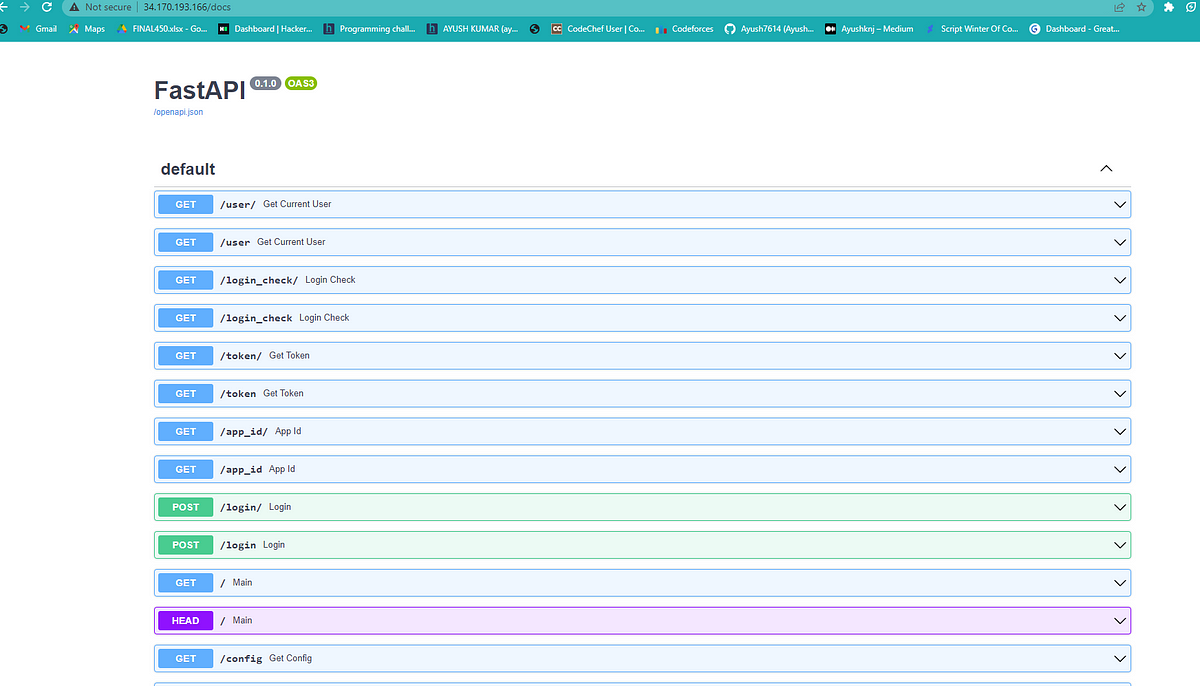
Once the API is enabled then you can access the API user interface available at http://vmip/docs, if you are running Stable Diffusion on VM. The user interface list all the available API, along with their input & output & it also allows tracking of the APIs.
If You are Running Stable Diffusion on a VM, you need to set up a Stable Diffusion environment. If you are not familiar with setting up the environment on a VM, you can refer to our below step-by-step guides for AWS, GCP, and Azure.
If you want to get more details about enabling APIs, you can refer to our blog post.
If you are enabling API using programming language then, for a comprehensive guide on all the things Please refer to the official wiki guide. Once the API is enabled then you can access the API user interface available at http://127.0.0.1:7860/docs.
- - api-auth
Setting authentication for an API is a critical step in securing access to the API and ensuring that only authorized users can utilize its features. This can be accomplished by specifying a username and password in the appropriate format, such as “username: password.” Additionally, multiple sets of authentication credentials can be specified by using a comma-delimited format, such as “u1:p1,u2:p2,u3:p3.” By specifying authentication credentials in this manner, access to the API can be effectively controlled, and security can be maintained. Therefore, it is essential to ensure that the appropriate format for specifying authentication credentials is used and that the credentials themselves are secure and appropriately managed.
Conclusion
In conclusion, this blog post serves as a useful guide for those seeking to learn about the prompt engineering, fundamental settings, and command line arguments of Stable Diffusion. By covering the most significant parameters and encouraging experimentation, readers can gain a better understanding of how to effectively utilize Stable Diffusion. Overall, this post provides valuable insights for those looking to improve their understanding of Stable Diffusion settings, prompt engineering, and command-line arguments.