Stable Diffusion & Dreambooth — A Step-by-Step Guide for Beginners
Stable Diffusion & Dreambooth — A Step-by-Step Guide for Beginners
Table of contents
- Introduction
- In this article, we will focus mainly on below topics
- Prerequisites
- What is Stable Diffusion?
- What is Dreambooth?
- How does Dreambooth work?
- What do you need to train Dreambooth
- Use Cases of Dreambooth with Stable Diffusion
- Dreambooth Demo using Stable Diffusion
- Dreambooth alternatives LORA-based Stable Diffusion Fine Tuning
- Conclusion
Introduction
Generative AI has been abuzz with DreamBooth. It’s a way to train Stable Diffusion on a particular object or style, creating your version of the model that generates those objects or styles. You can train a model with as few as three images and the training process takes a few minutes.
Notably, DreamBooth works with people, so you can make a version of Stable Diffusion that can generate images of yourself.
People have been making some magical products with DreamBooth, such as Avatar AI and ProfilePicture.AI.
Now, you can create your projects with DreamBooth too.
In this article, we will focus mainly on below topics
What is Stable Diffusion?
What is Dreambooth?
How does Dreambooth work?
What do you need to train Dreambooth
Stable Diffusion + Dreambooth
Use Cases of Dreambooth with Stable Diffusion
Dreambooth alternatives LORA-based Stable Diffusion Fine Tuning
Conclusion
Prerequisites
In this article, we will discuss Stable Diffusion and Dreambooth. To run Dreambooth, you need to set up a Stable Diffusion environment. If you are not familiar with setting up the environment on a VM, you can refer to our below step-by-step guides for AWS, GCP, and Azure.
For AWS,
For GCP,
For Azure.
What is Stable Diffusion?
- Stable Diffusion is deep learning, text-to-image AI/machine learning model released in 2022. It is primarily used to generate detailed images conditioned on text descriptions, though it can also be applied to other tasks such as inpainting, outpainting, and generating image-to-image translations guided by a text prompt. It was developed by the start-up Stability AI in collaboration with several academic researchers and non-profit organizations.

What is Dreambooth?
Dreambooth is a technique to teach new concepts to Stable Diffusion using a specialized form of fine-tuning. Some people have been using it with a few of their photos to place themselves in extraordinary situations, while others are using it to incorporate new styles.
In Dreambooth, fine-tuning means adjusting a model that was trained on one dataset to work with a new, related dataset.
Below is an example of a Dreambooth Model Using just 3 images of a bodybuilder as input, the Dreambooth model can generate images of a bodybuilder in different contexts.

How does Dreambooth work?
It’s like a photo booth, but once the subject is captured, it can be synthesized wherever your dreams take you.
Sounds great! But how well does it work? Below is an example in the attached image. Using just 4 images of a particular man as input, the Dreambooth model can generate images of Man in different contexts.
The methodology used to run implementations of DreamBooth involves the fine-tuning of such models using a small set of images depicting a specific subject, with three to five images identified as generally sufficient, and these images are paired with text prompts that contain the name of the class the subject belongs to, plus a unique identifier.
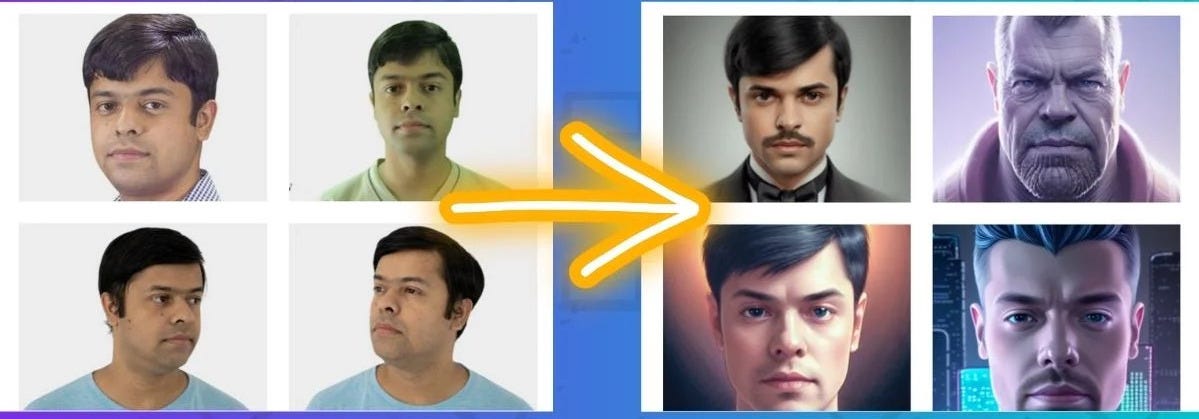
Dreambooth
What do you need to train Dreambooth
You will need three things
A few custom images.
A unique identifier.
A class name.
In the above example. The unique identifier is Particular Man. The class name is Man.
4. Then you will need to construct your instance prompt:
- a photo of [unique identifier] [class name]
5. And a class prompt:
- a photo of [class name]
6. In the above example, the instance prompt is
- a photo of a Particular Man
7. Since a Particular man is a man, the class prompt is
- a photo of a man
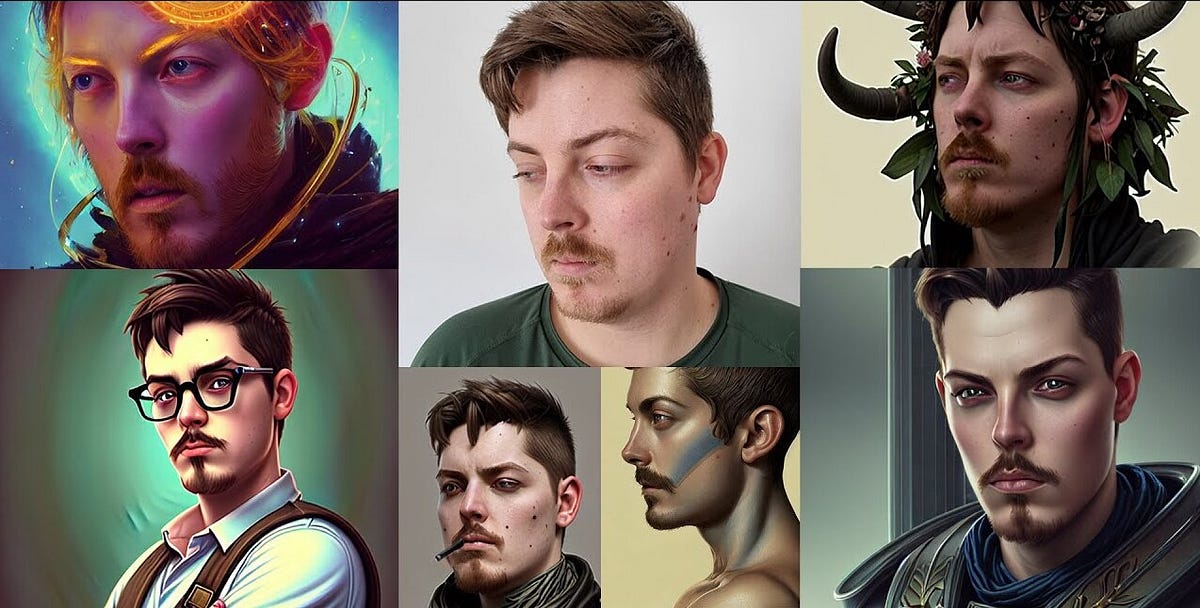
Make anyone in a Few Minutes
Use Cases of Dreambooth with Stable Diffusion
- Image Manipulation: Dreambooth can be used to manipulate images in various ways, such as changing facial expressions or adding new objects to a scene. This can be useful in fields like advertising, where it’s important to create eye-catching visuals that stand out from the competition.

- Art: Dreambooth can be used by artists to create unique and imaginative pieces of art. By using Stable Diffusion to generate new images, artists can explore new styles and techniques that they might not have thought of otherwise.
- Fashion: Dreambooth can be used in the fashion industry to create virtual fashion shows and photo shoots. This can be useful for showcasing new collections and designs without the need for physical models and locations.
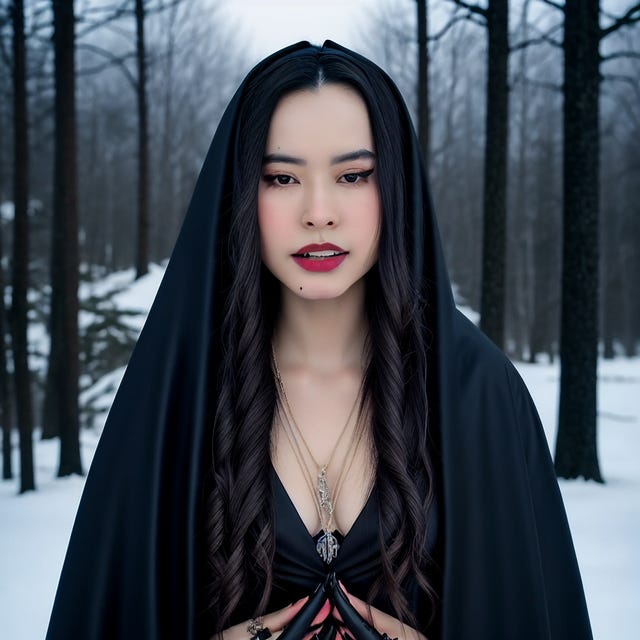
- Personalize or Create a specific character via Dreambooth: We can train on just ~20 images of your character whereas the other methods will overfit easily or not work at all. Dreambooth also allows you to easily transfer your character to a different mode.

- Film and TV: Dreambooth can be used in the film and TV industry to create realistic special effects and CGI. This can save time and money by reducing the need for physical props and sets.

Dreambooth Demo using Stable Diffusion
- To access the Stable Diffusion GUI via browser, Copy the public IP of the VM from the VM’s overview page and paste it into the browser. Hit enter.

- The Stable Diffusion GUI comes with lots of options and settings. The first window shows Dreambooth Option.
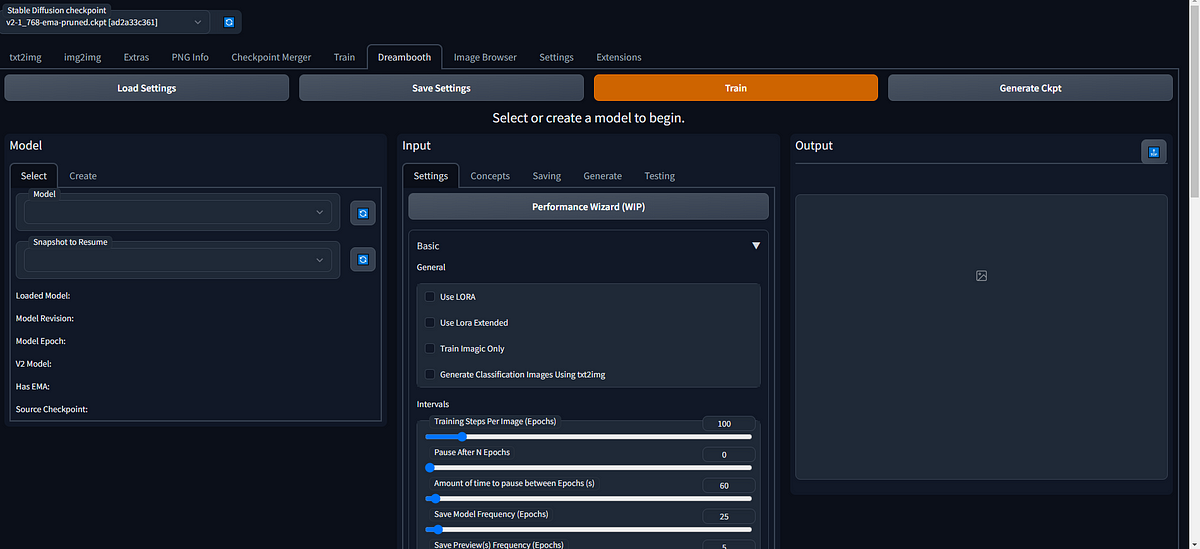
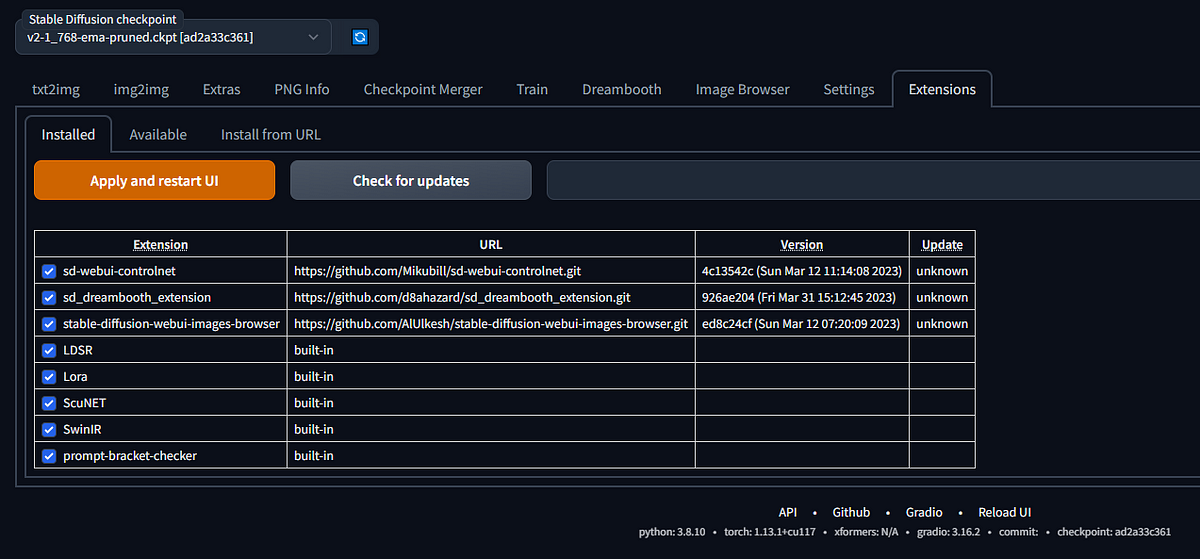
- First You Go to the Extension Section and Check the Dreambooth Extension, is installed or not.
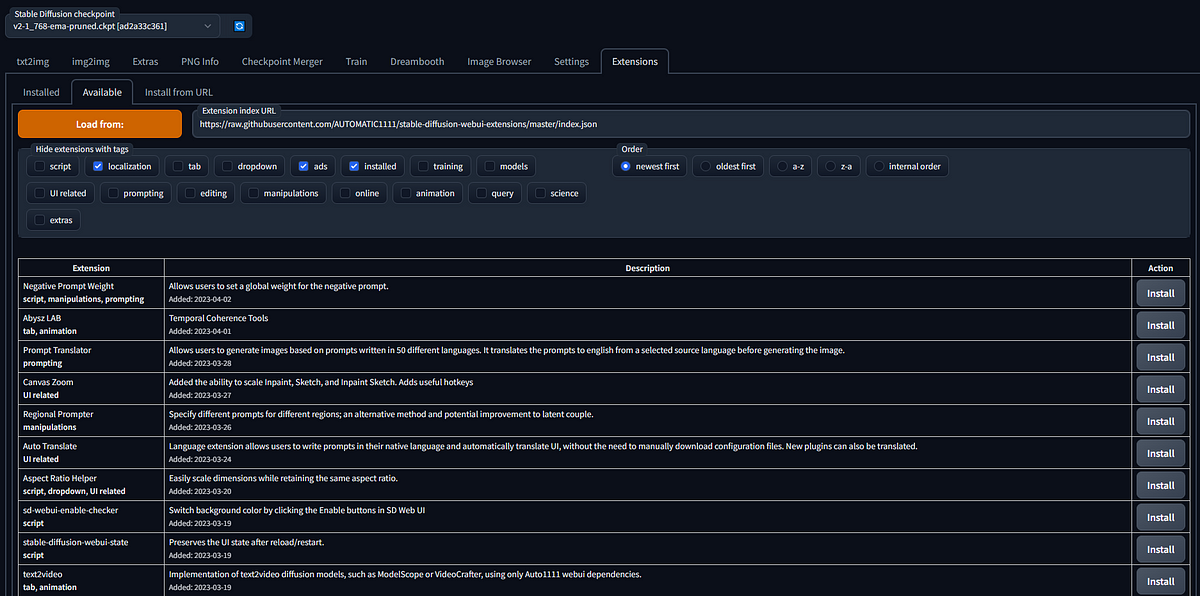
- If it is not installed, then go to the available option, see the list of extensions, find Dreambooth, and installed it. In my case, it is already installed.
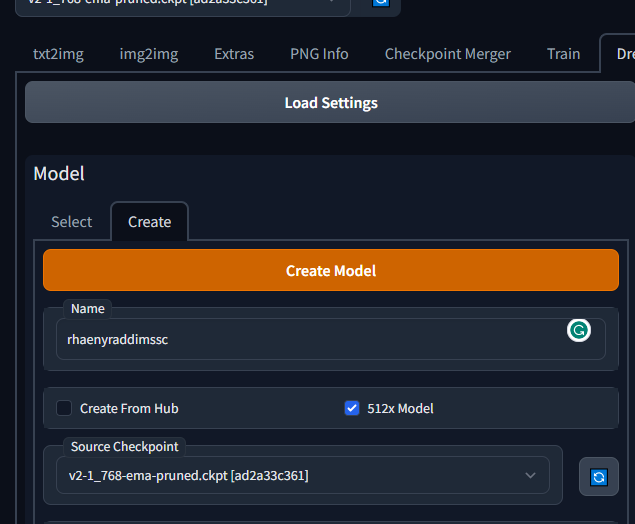
- Now we can Try the Dreambooth, First, we can click on the create button, and then we can give the name, in my case I use one model name that is “rhaenyraddimssc”, and then give the source checkpoint. Now click on the created model, and your empty model is finally created.
- Now you can go to the settings option, you can see here a bunch of options, and now you can do all the settings.
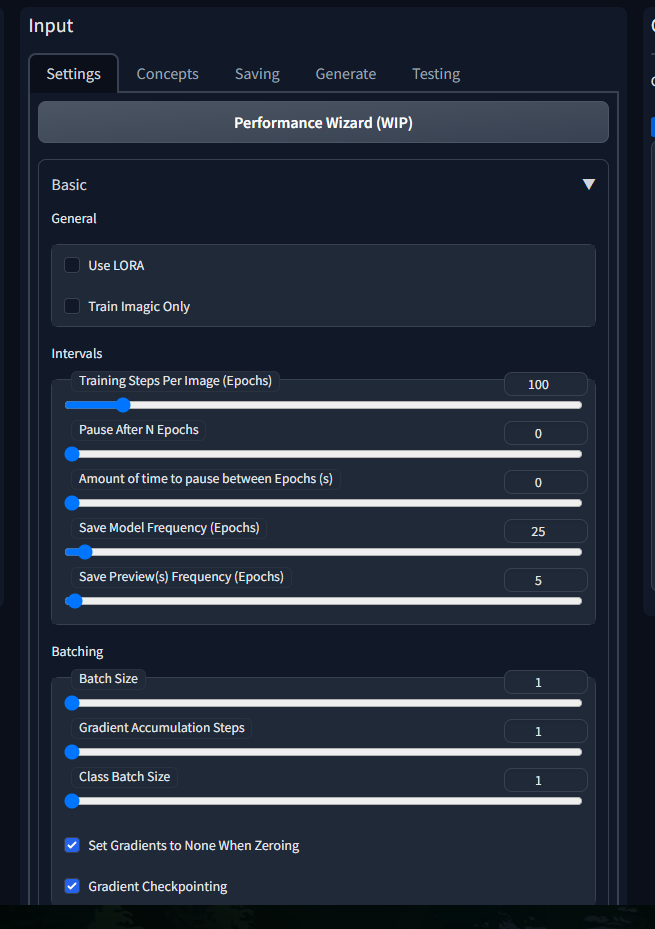
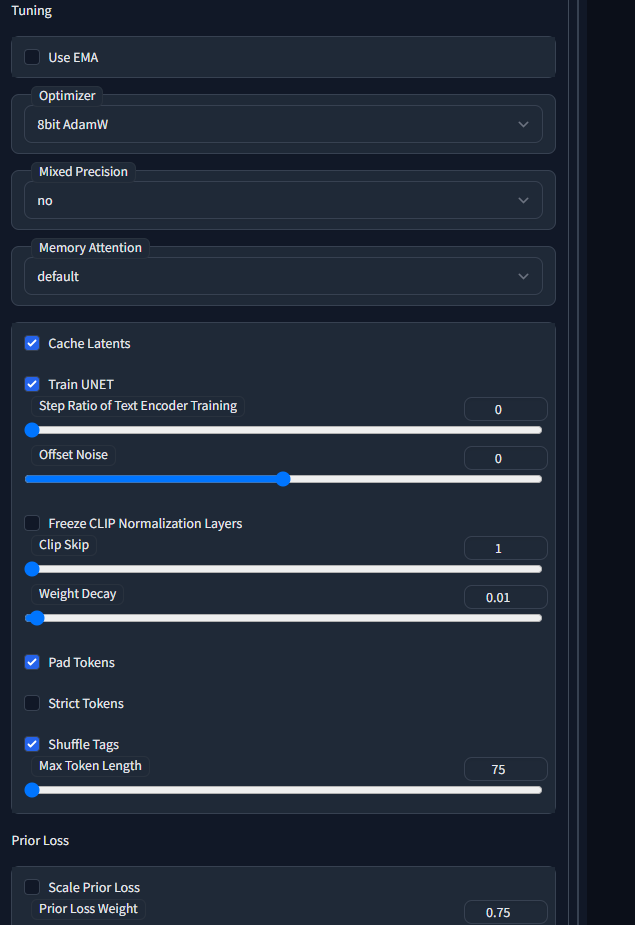
- You can set all the things according to your need.
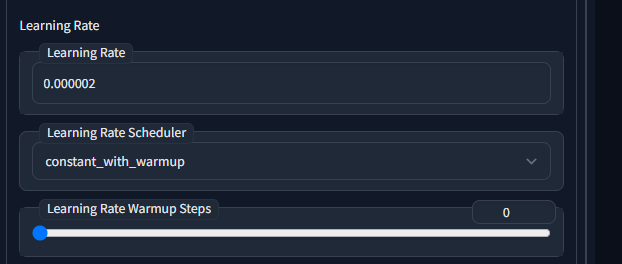
You can find here all the things like Learning Rate, scheduler, and so on.
- Now You can Go to the Concepts section, and add all the things like Dataset Directories, Instance Prompt, and Class Prompt.
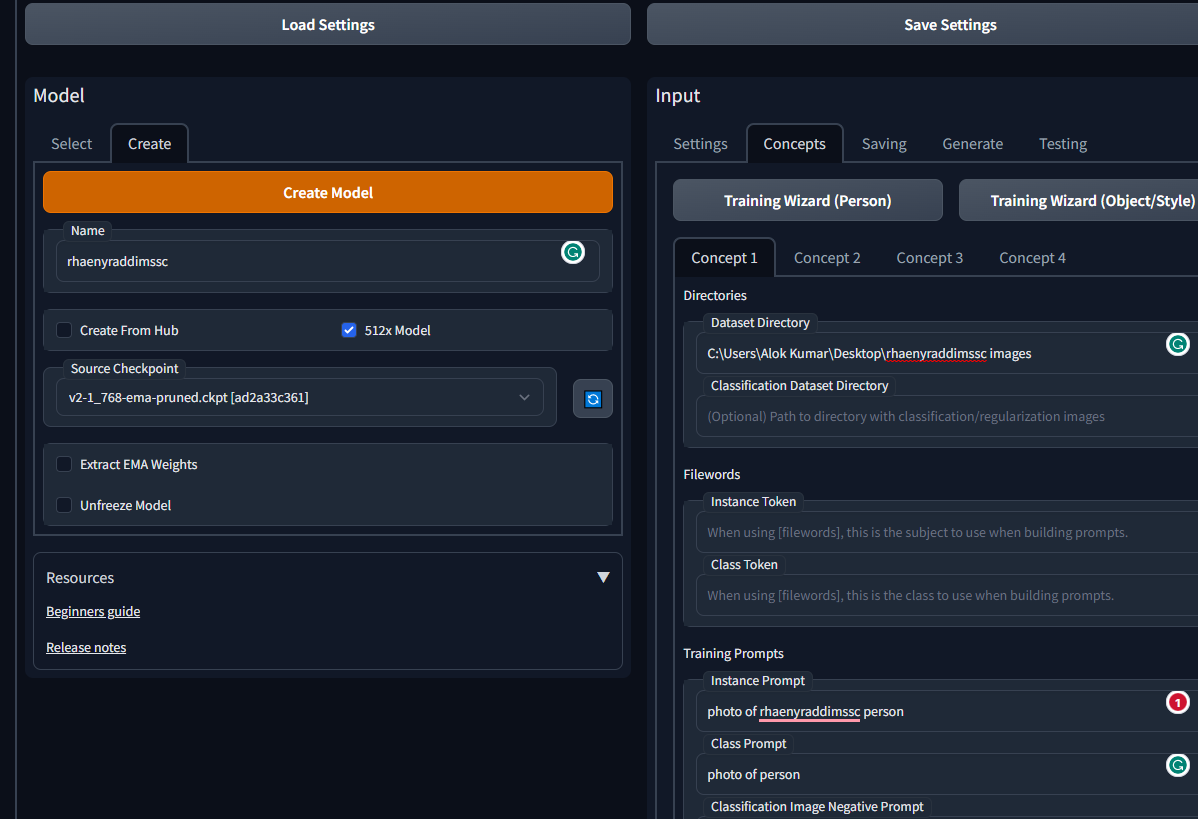
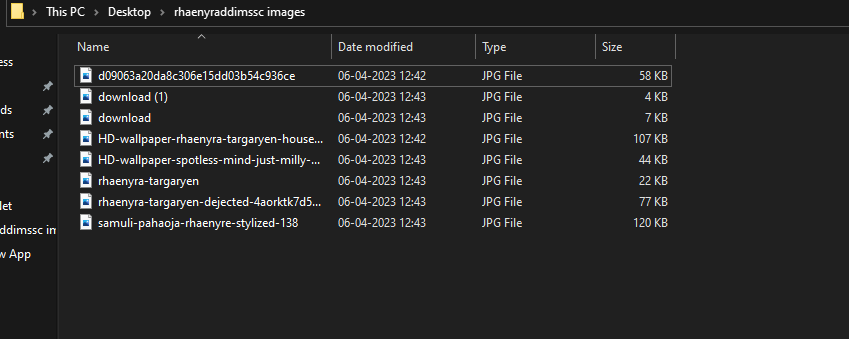
- In Dataset Directory, You give the image path of Your Local Machine, I have some images of “rhaenyraddimssc” on my machine, so I added that Path.
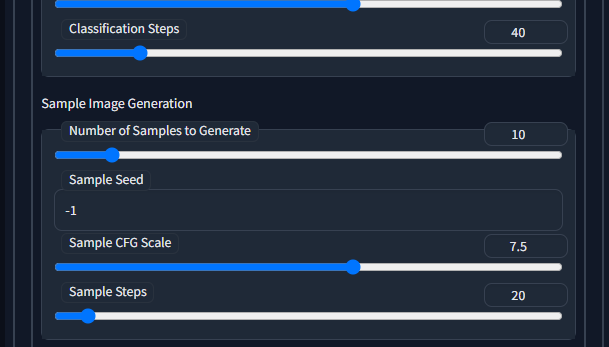
- You can also do the number of samples to Generate, and sample the CFG scale, this totally depends on Your need.
After all the settings click on Train Button.
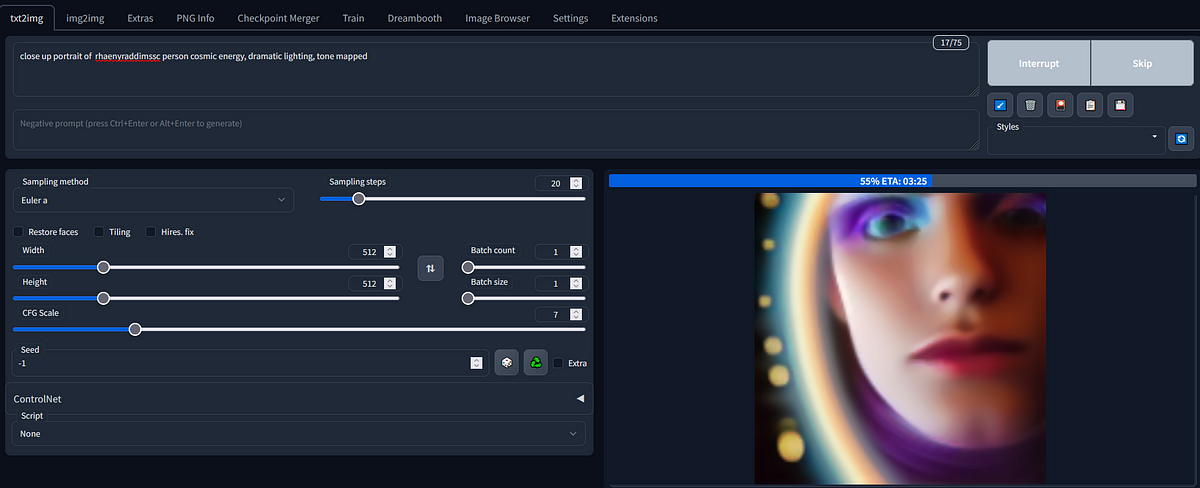
Then Go to the Prompt Section and write the Prompt.
And select the stable diffusion CheckPoint.

- Now You can see the Generated Output.
Dreambooth alternatives LORA-based Stable Diffusion Fine Tuning
Last year, DreamBooth was released. It was a way to train Stable Diffusion on your objects or styles.
A few short months later, Simo Ryu created a new image generation model that applies a technique called LoRA to Stable Diffusion. Similar to DreamBooth, LoRA lets you train Stable Diffusion using just a few images, and it generates new output images with those objects or styles. Unlike DreamBooth, LoRA is fast: While DreamBooth takes around twenty minutes to run and produces models that are several gigabytes, LoRA trains in as little as eight minutes and produces models that are around 5MB.
LoRA stands for Low-Rank Adaptation, a mathematical technique to reduce the number of parameters that are trained. You can think of it as creating a diff in the model, instead of saving the whole thing.

Conclusion
In this article, we explained the Dreambooth Features and Provided a Step by Step Guide using Dreambooth on Automatic 1111 Stable Diffusion Interface. If you find this article helpful and want to try Dreambooth with Stable Diffusion, Please check our below article to set up Stable Diffusion with Dreambooth. You can find the link below.
