How to Setup Stable Diffusion With AUTOMATIC1111 Web Interface On Azure
How to Setup Stable Diffusion With AUTOMATIC1111 Web Interface On Azure
Table of contents
No headings in the article.
Introduction
Machine learning and AI-based generative models have revolutionized the field of computer science and artificial intelligence. AI-based image generation is an exciting area of research within the field of machine learning and artificial intelligence. The goal of AI-based image generation is to develop algorithms that can generate new images similar to the input images it was trained on.
In this article, we will introduce four topics
Stable Diffusion — Stable Diffusion is a deep learning, text-to-image model released in 2022.
AUTOMATIC1111 Web Interface — A browser interface based on the Gradio library for Stable Diffusion.
Azure — The Azure cloud platform is more than 200 products and cloud services designed to help you bring new solutions to life — to solve today’s challenges and create the future. Build, run, and manage applications across multiple clouds, on-premises, and at the edge, with the tools and frameworks of your choice.
Step by Step guide — Guide on how to set up Stable Diffusion on Azure.
What is Stable Diffusion?
It is the field of artificial intelligence, particularly in the development of deep learning models. In recent years, there has been growing interest in developing deep-learning models. Stable Diffusion-based models have been used in various AI applications, including natural language processing, speech recognition, and image and video processing.
What is AUTOMATIC1111 Web Interface?
AUTOMATIC1111 (A1111 for short) is the de facto GUI & Browser based interface for utilizing Stable Diffusion capabilities.
The web interface is very intuitive and easy to use for beginner-level users but at the same time, has a lot of advanced features to be used by professional-level users. Some of the key features include:
Text-to-image and Image to image processing.
The extension-based design allows an ecosystem of plug & play extensions to add new functionalities.
Lots of other features such as in-painting, colour sketch, and prompt metric to name a few.
Thanks to the passionate open-source community, most new features come to this free Stable Diffusion GUI first.
What is Azure?
Microsoft Azure*, formerly known as Windows Azure, is Microsoft’s public cloud computing platform. It provides a broad range of cloud services, including computing, analytics, storage, and networking. Users can pick and choose from these services to develop and scale new applications or run existing applications in the public cloud.*
The Azure platform aims to help businesses manage challenges and meet their organizational goals. It offers tools that support all industries — including e-commerce, finance, and a variety of Fortune 500 companies — and is compatible with open-source technologies. This gives users the flexibility to use their preferred tools and technologies. In addition, Azure offers four different forms of cloud computing: infrastructure as a service (IaaS), platform as a service (PaaS), software as a service (SaaS), and serverless functions.
Prerequisites for deploying Stable Diffusion on Microsoft Azure
Microsoft Azure Account
Computing requirements:” Stable Diffusion requires significant processing power for optimal performance, preferably with a GPU instance. In cases where the cost of a GPU instance is prohibitive, a CPU instance with higher processing capacity may serve as a viable alternative.”
Below are recommended VM configuration requirements on Azure:
GPU VM: Standard_NC4as_T4_v3 (4vcpu, 28GB memory)
CPU VM : Standard_B4ms (4vcpu, 16GB ram)
Step by Step Guide to install, setup, and run Stable Diffusion with AUTOMATIC1111 UI on Azure
This step-by-step guide describes how to launch and connect to Techlatest’s Stable Diffusion with AUTOMATIC1111 Web Interface on Microsoft Azure.
Step 1
Open Azure Stable Diffusion: API & AUTOMATIC1111 UI VM listing on Azure Marketplace.

Step 2
Click on the Get It Now Button. If you are not already logged in, it will navigate you to the Login Page. Log in with your credentials and Click on the Continue option.

Step 3
Next, it shows the product details page where you can see multiple options to choose from. Please click on Create button.

Select a Resource group for your virtual machine.
Select a Region where you want to launch the VM(such as East US).
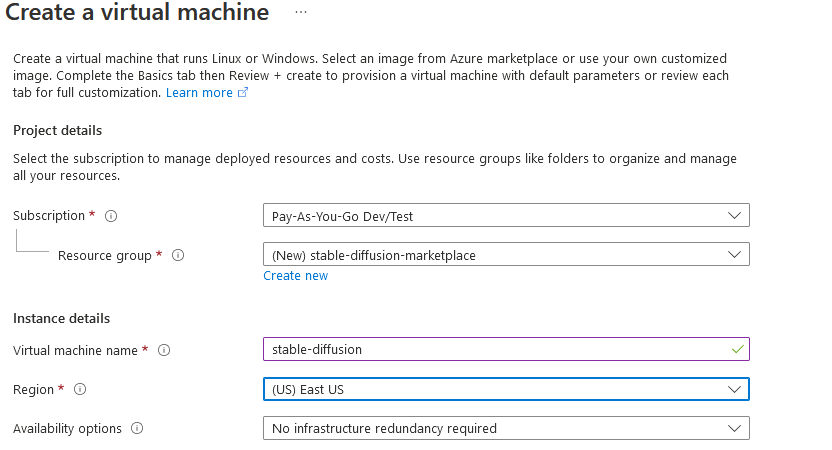
Make sure to select “Standard” from the dropdown for “Security type”.
Optionally change the number of cores and amount of memory (size).
Step 4
Select the Authentication type as Password and enter Username as ubuntu and the Password of your choice.

Step 5
Optionally change the OS disk type.

Step 6
Select the default Networking configuration. The default Networking configuration comes with ports 22 (for SSH), 3389 (for RDP), and 80 (for HTTP) exposed.
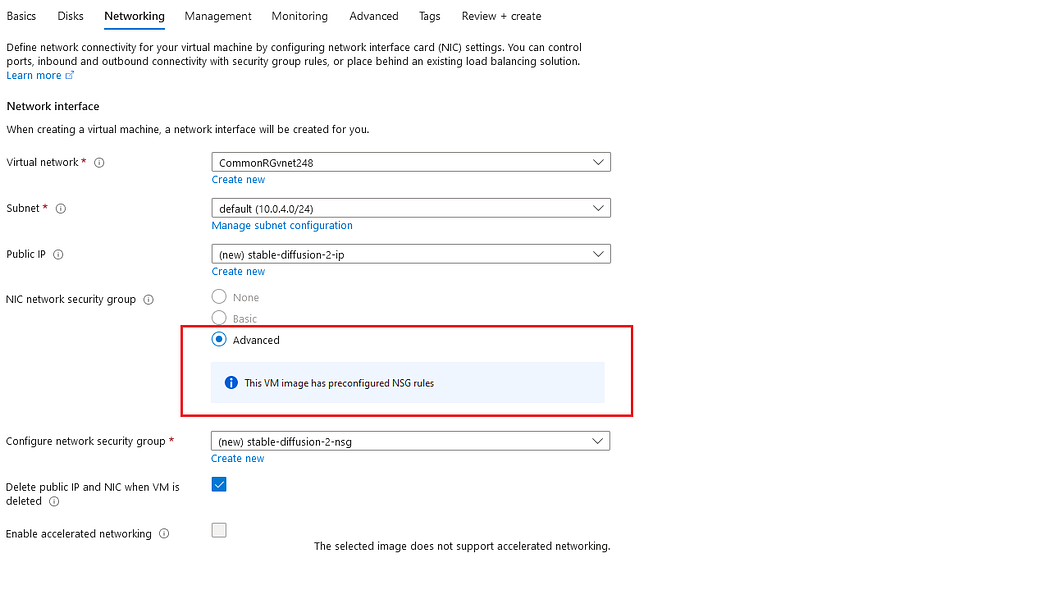

Optionally go to the Management, Advanced, and Tags tabs for any advanced settings you want for the VM.
Click on Review + Create and then click on Create when you are done.
After all these Steps Virtual Machine will begin deploying.
Step 7
A summary page displays when the virtual machine is successfully created. Click on Go to resource link to go to the resource page. It will open an overview page of the virtual machine.

Step 8
To access the Stable Diffusion GUI via browser, Copy the public IP of the VM in the browser and hit enter.
Note: Please use HTTP and not HTTPS in the URL when accessing the AUTOMATIC1111 interface in GUI, for eg. http://vm_public_ip.
Please Note that for the first time, GPU instances will take 5–10 minutes and CPU instances will take 10–15 minutes to launch the app in the browser. But if the Web interface is not accessible even after 15 minutes please Contact Us for assistance.

Step 9
The Stable Diffusion GUI comes with lots of options and settings. The first window shows text to the image page. Provide the Prompt and click on Generate button and wait till it finishes.

Step 10
Output Images can be seen in the Image Browser tab. Click on the Image browser and click on the first page to load the images.
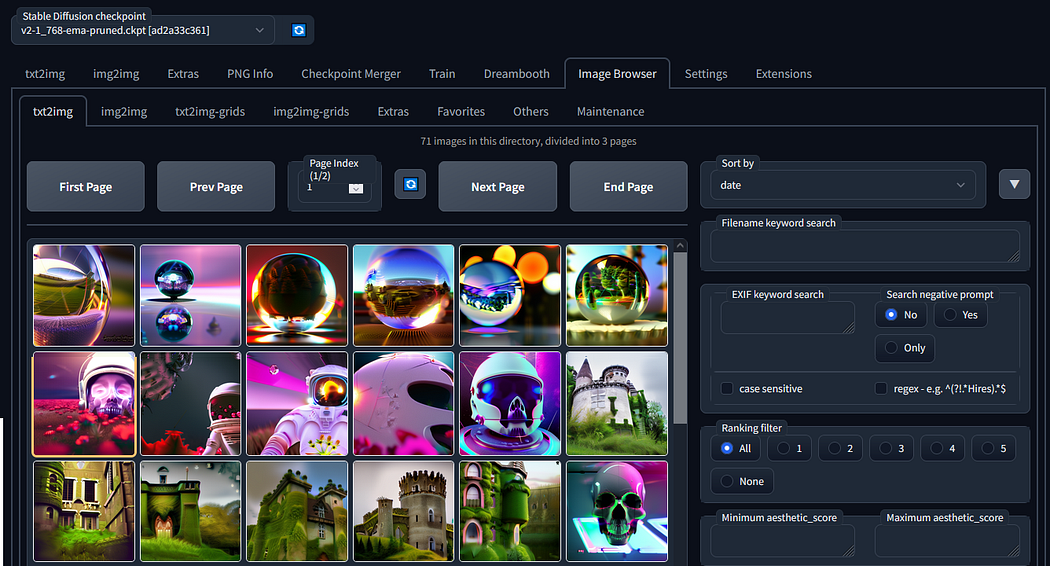
Step 11
To change any settings, go to the Settings tab.

Step 12
Web UI also provides you with the option to add extensions. Navigate to the extensions tab, go to available, and select load from the URL. It will list all the available extensions.
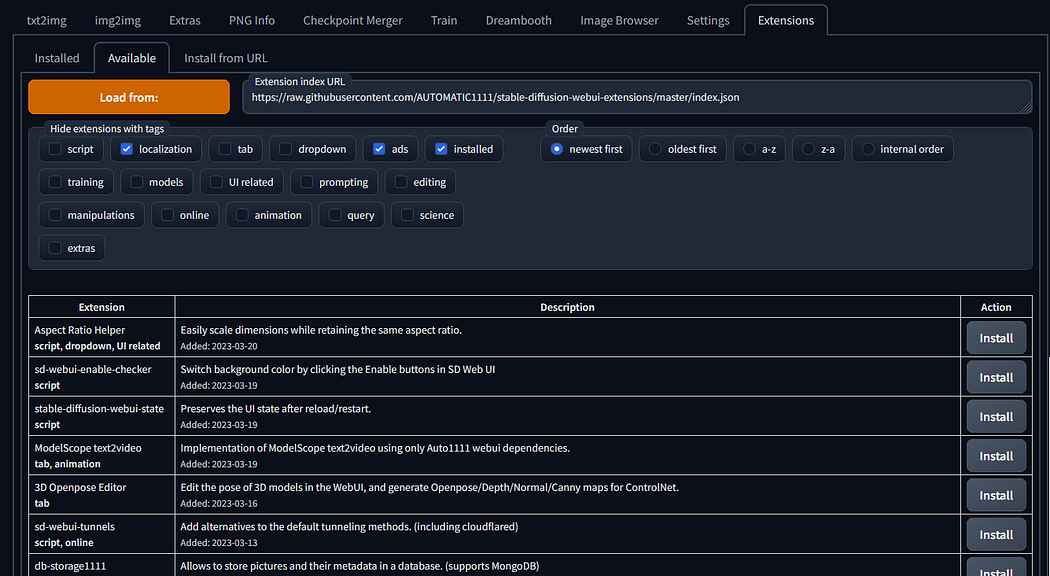
Step 13
For more information on how to use the GUI and its full features, please visit Stable Diffusion Web UI.
Step 14
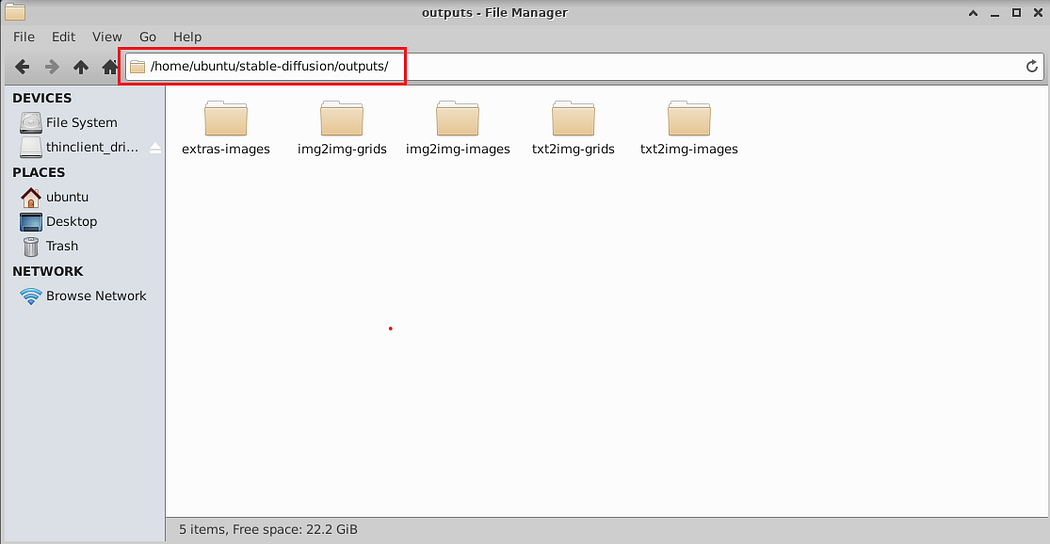
The images created from GUI are stored under /home/ubuntu/stable-diffusion/output/ directory on the VM. To access this directory, follow the below steps:
Step 15
Connect to the VM’s desktop environment from any local Windows machine using RDP protocol.
Step 16
If for any reason you don’t remember your VM’s password then you can reset it. In the left pane, scroll down to the Help section and click on Reset password. Enter ‘Username’ as ubuntu and ‘Password’ of your choice. Click on the Update button to save the changes.

Step 17
To connect using RDP via Windows Machine, first, note the public IP address of the VM from the VM details page as highlighted below.

Step 18
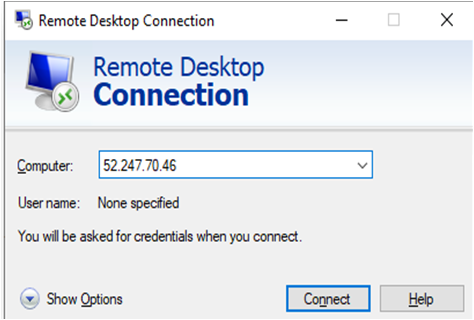
Then From your local Windows machine, go to the “start” menu, in the search box type and select “Remote desktop connection”. In the “Remote Desktop Connection” wizard, copy the public IP address, paste it, and click on the connect Button.
Step 19
This will connect you to the VM’s desktop environment. Provide the username as ubuntu and the password provided during the VM creation to authenticate. Click on the OK Button.

Step 20
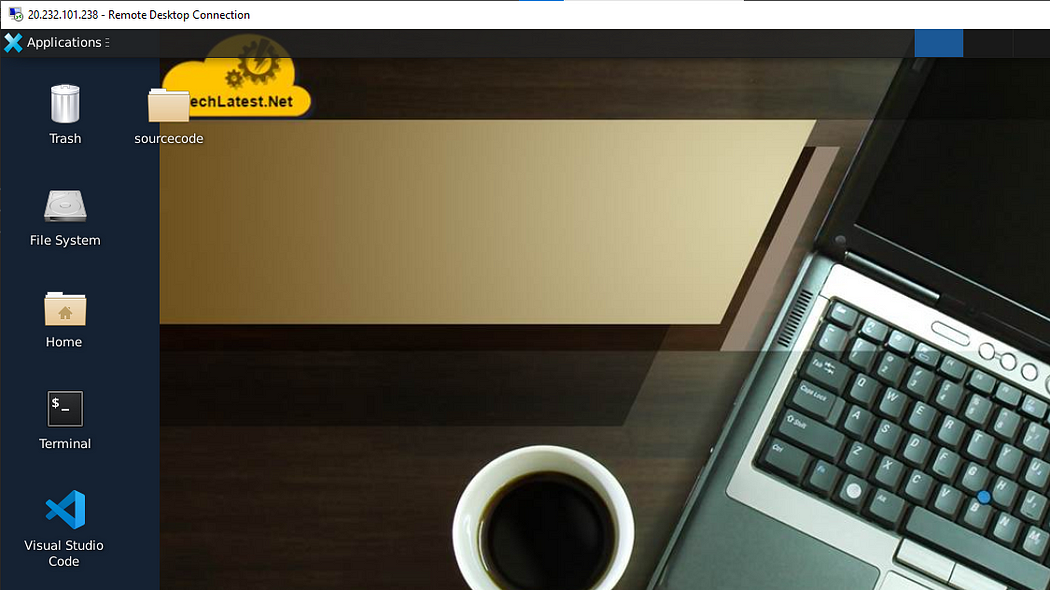
Now you are connected to the box Azure Stable Diffusion: API & AUTOMATIC1111 UI environment via Windows Machine.
Step 21
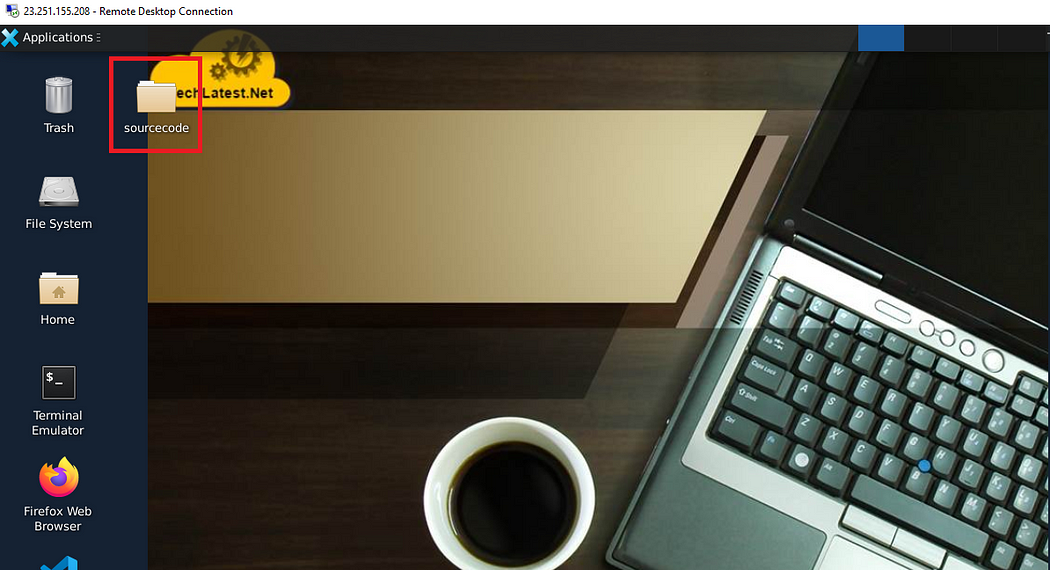
You can also access the source code of the Stable Diffusion. It is available under the sourcecode folder on the Desktop.
Step 22
To SSH to the VM, Open putty and paste the IP address and click on Open Button.

Step 23
Login as ubuntu and provide the password for the ‘ubuntu’ user.

Step 24
This VM is pre-configured for Stable Diffusion with an enabled API (Application Programming Interface). To access the preinstalled APIs, follow the below steps:
Open the VM’s URL using http://vmip/docs. Here you can find the list of APIs.

- Search for txt2img API, then click on the arrow at the right end of the searched API line, it gives an example of a payload to send to the API. Click on the Try it out button.

- This will enable the Request Body and Execute buttons. Try with the below code snippet in the request body and click on Execute button.
{
"prompt": "duck flying in sky",
"steps": 5
}

- After clicking on the “Execute” button, You can observe the progress in the terminal by running the below Command-
tail -f /var/log/cloud-init-output.log

- Once image processing is complete, in the API web console, it will show “200” as the response code and the response field will have a response in JSON format with the image in the “images:” field of JSON.

Step 25
Please note that APIs are exposed on the public internet and you must add necessary security controls to secure the API.
Step 26
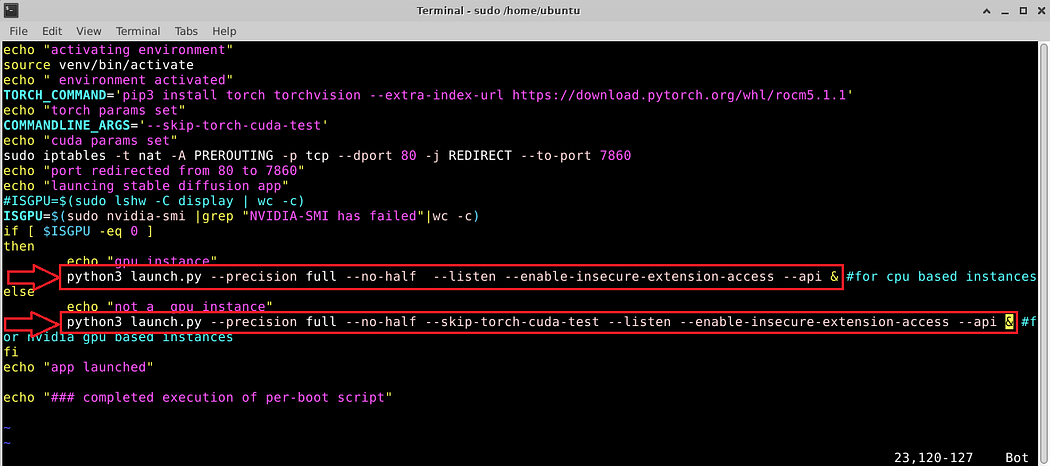
If you want to disable the API or want to make any further configuration changes then please update line 20 and line 23 of /var/lib/cloud/scripts/per-boot/sd-per-boot.sh file as per the Stable Diffusion Wiki documentation.
sudo vi /var/lib/cloud/scripts/per-boot/sd-per-boot.sh
- TechLatest.net is a registered cloud partner with Amazon Web Services (AWS), Microsoft Azure, and Google Cloud Platform (GCP). It offers a comprehensive range of cloud-based products and solutions that come equipped with an array of out-of-the-box functionalities, pre-installed setups, demos, videos, tutorials, and various other tools that aid in expediting technology evaluation and adaption. Additionally, Techlatest’s products are readily available on popular marketplaces such as AWS Marketplace, Azure Marketplace, and Google Cloud Marketplace, providing customers with an opportunity to explore and experience them firsthand.

