
How to Setup ParrotOS Linux Environment on AWS(Amazon Web Services)
How to Setup ParrotOS Linux Environment on AWS(Amazon Web Services)


Introduction
Parrot is based on top of Debian, the most advanced and recognized universal operating system that can run anywhere. From your laptop to your Phone, the Parrot core can be executed on a huge range of environments, including servers, IoT boards, cloud containers (like docker and podman) and more.
In this article, we will introduce three topics
Parrots OS Linux — It is a free and open-source GNU/Linux distribution that is based on Debian Stable and designed for security experts, computer forensics, reverse engineering, hacking, penetration testing, anonymity, privacy, and cryptography. Frozenbox develops it and comes with MATE as the default desktop environment.
Features of ParrotOS which is provided by Techlatest.net.
Step by Step guide — Guide on how to set up ParrotOS Linux Environment on Amazon Web Services(AWS).
Features of ParrotOS provided by Techlatest.net
Easy Setup: Setting up ParrotOS is incredibly easy, making it an attractive choice for both beginners and experienced users. The installation process is straightforward and user-friendly, ensuring a smooth experience for those new to the operating system. And You can set up the OS in a few clicks.
GUI-Based Interface: GUI-based interface which is accessible from anywhere anytime, in ParrotOS enhances usability, improves productivity, and contributes to a more enjoyable user experience while conducting penetration testing tasks.
Predefined ParrotOS Packages: ParrotOS which is provided by Techlatest comes with 1000+ Preinstalled packages.
Step by Step Guide to install, setup, and run ParrotOS Linux Environment On Amazon Web Services(AWS)
Note
If you want to save time to set up a ParrotOS on AWS with out of the box environment, you can opt for Techlatest’s ParrotOS Linux, available on the AWS marketplace.
If you are looking to quickly set up and explore ParrotOS, Techlatest.net provides out-of-the-box setup for ParrotOS on AWS, Azure and GCP. Please follow the below links for the step-by-step guide to set up ParrotOS on your choice of cloud platform.
For ParrotOS Linux: AWS, GCP & Azure.
- Step 1
Open ParrotOS Linux VM listing on the AWS marketplace.

- Step 2
Click on Continue to subscribe.
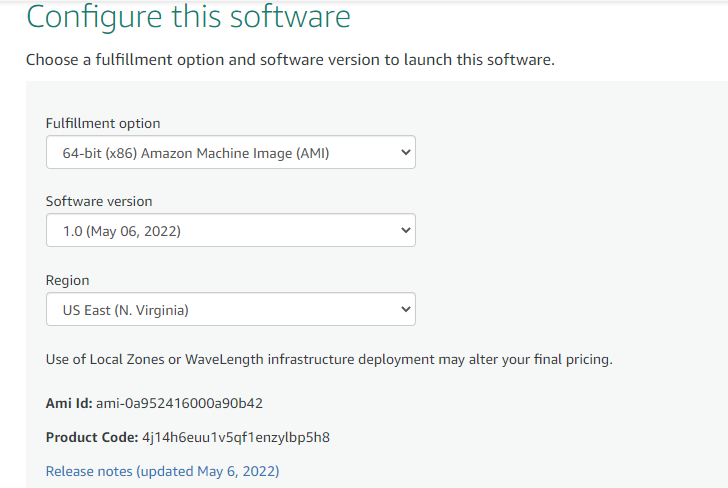
Log in with your credentials and follow the instruction. Click on the Continue to configuration Button.
Select a Region where you want to launch the VM(such as US East (N.Virginia)).
Choose Action: You can launch it through EC2 or from Website.(Let’s choose Launch from the website).
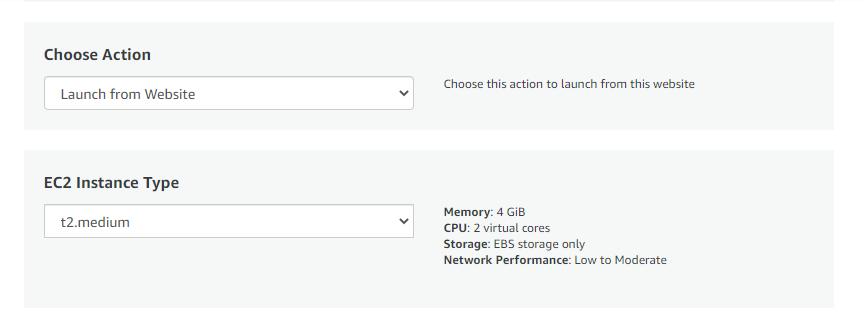
Optionally change the EC2 instance type. (This defaults to t2.medium instance type, 2 vCPUs and 4 GB RAM).
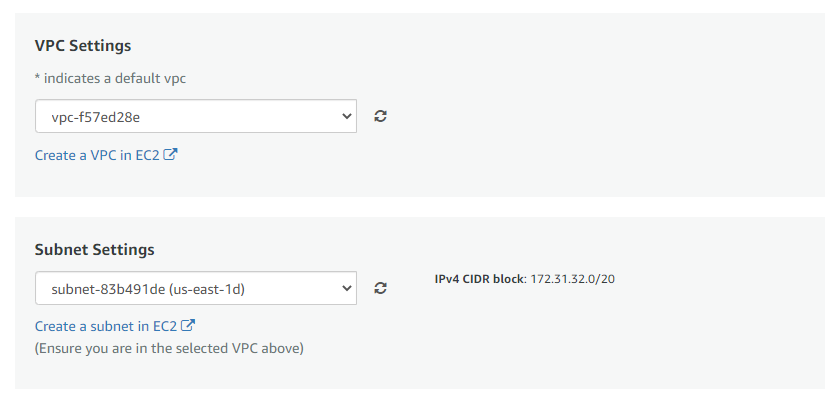
Optionally change the network name and subnetwork names.
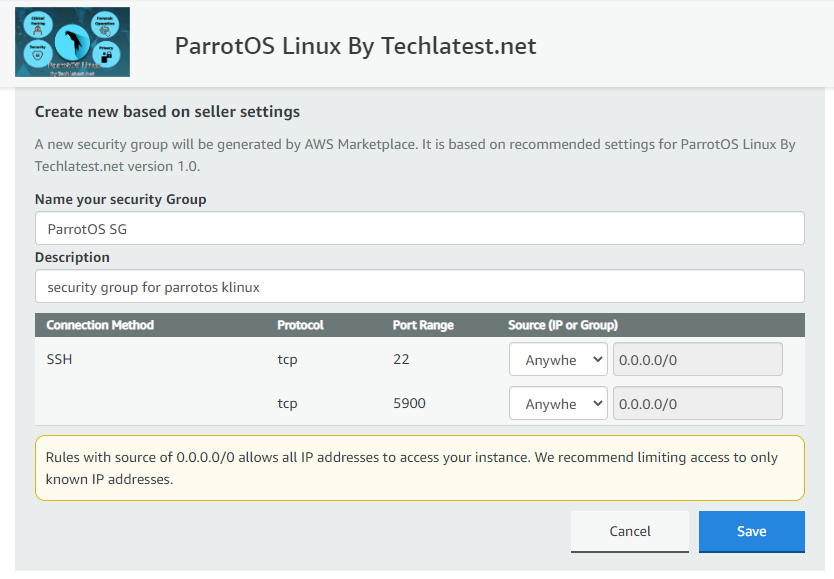
Select the Security Group. Be sure that whichever Security Group you specify has ports 22 (for SSH) and 5900 (for VNC) exposed.
Be sure to download the key pair which is available by default, or you can create the new key pair and download it.
Click on the Launch Button.
ParrotOS Linux will start deploying.
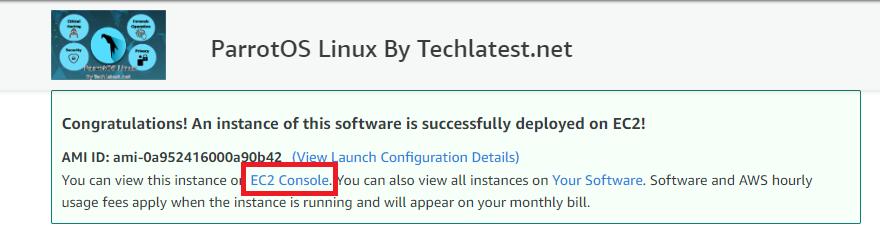
- Step 3
A summary page is displayed. To see this instance on EC2 Console click on EC2 Console link.
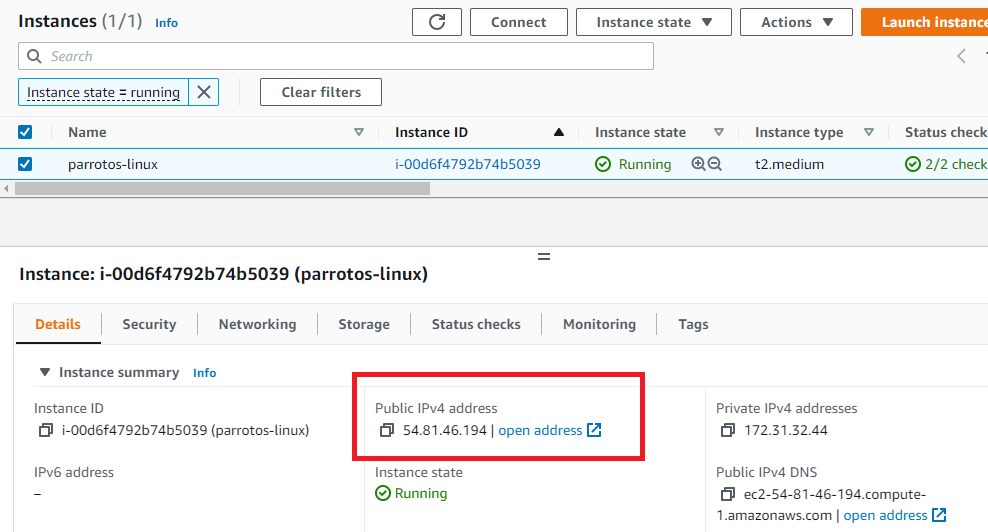
- Step 4
On the EC2 Console page, the instance is up and running. To connect to this instance through putty, copy the IPv4 Public IP Address.
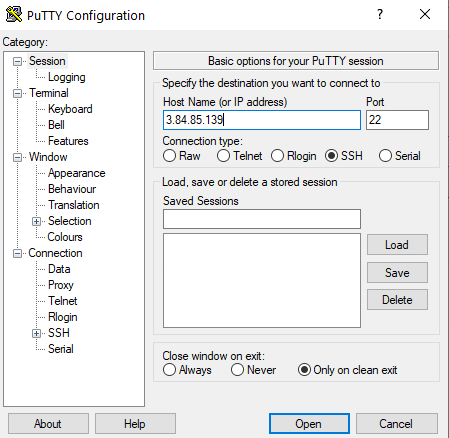
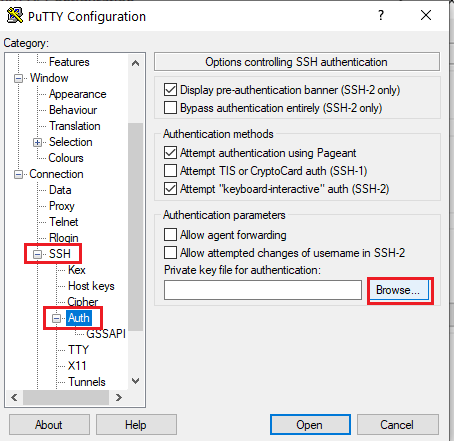
- Step 5
Open Putty, paste the IP address and browse the private key you downloaded while deploying the VM, by going to SSH->Auth, click on Open.
- Step 6
Login as ubuntu.
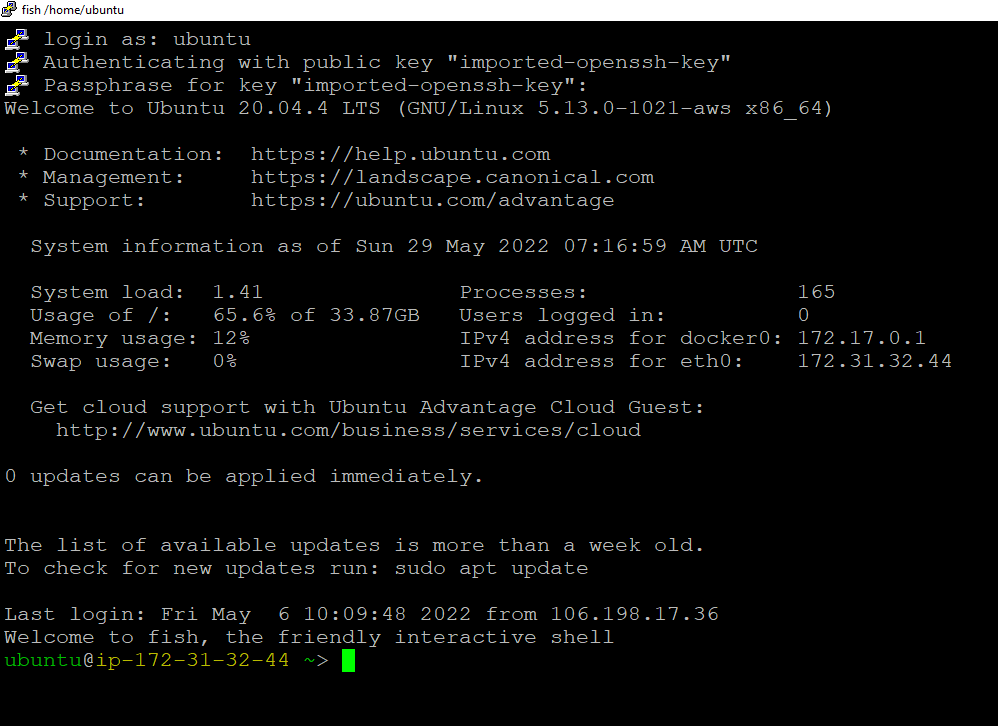
Run the below command to connect to the ParrotOS terminal from the SSH command prompt.
sudo docker exec -it parrotos /bin/bash
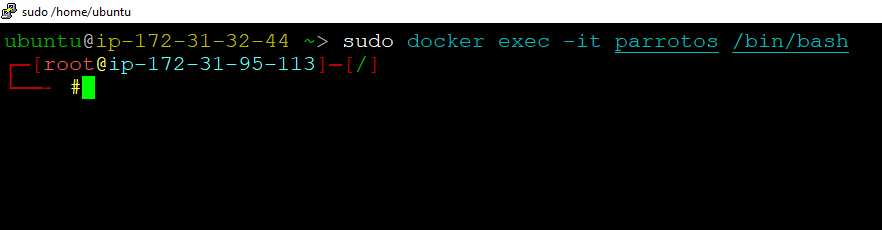
If the above command returns an “Error response from daemon:” error, then run the below command to start the ParrotOS container and then run the above command again.
sudo docker start parrotos

- Step 7
You can connect to the VM’s desktop environment from any local Windows machine using VNC protocol.
- Step 8
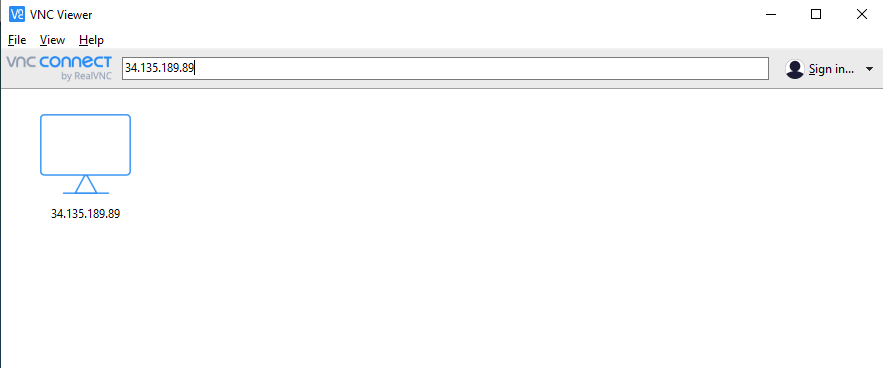
To connect using VNC Client via Windows Machine, first note the public IP address of the VM.
Then From your local Windows machine, go to the “start” menu, in the search box type and select “VNC”.
Note: If you don’t have VNC installed on your Windows machine, first Install VNC Viewer as per your device.
- Step 9
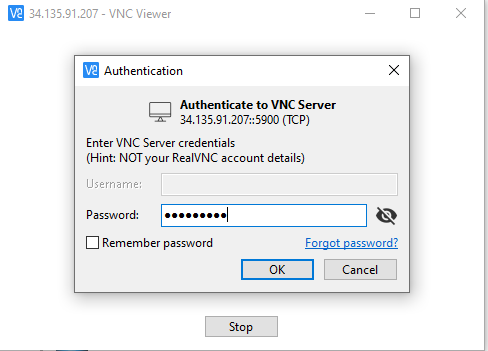
In the “VNC Viewer” wizard, copy the external IP and click on the connect Button. & Accept the encryption warning.
- Step 10
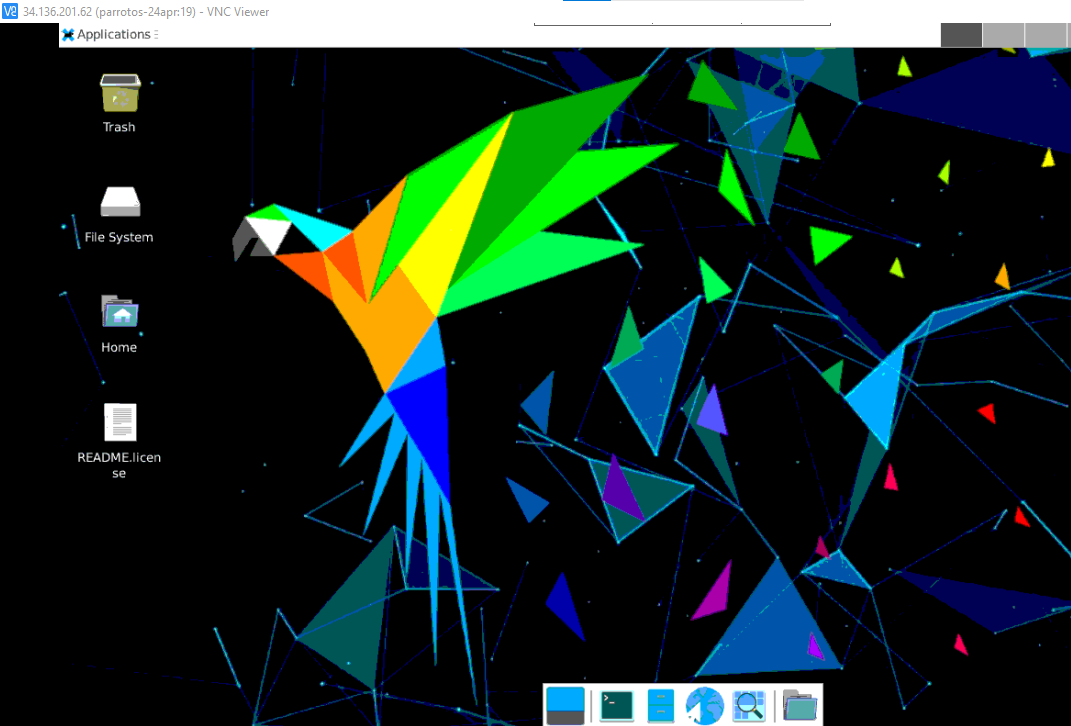
Now you are connected to of box ParrotOS Linux environment via Windows Machine with root user.
- Step 11
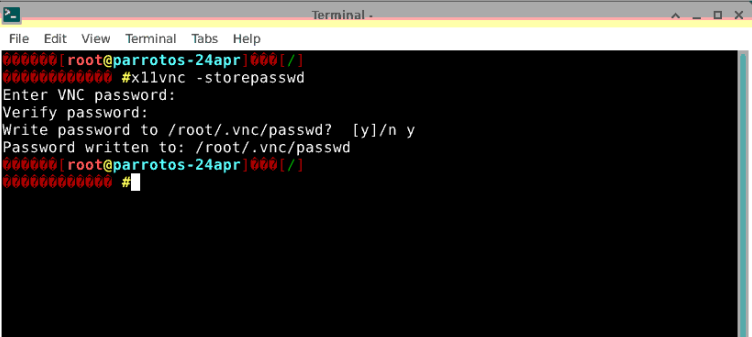
After your first login, Open the terminal and run the below command to change the root user password.
x11vnc -storepasswd
- Step 12
Once password for root user is set, re-login with the root user and new password.
- Step 13
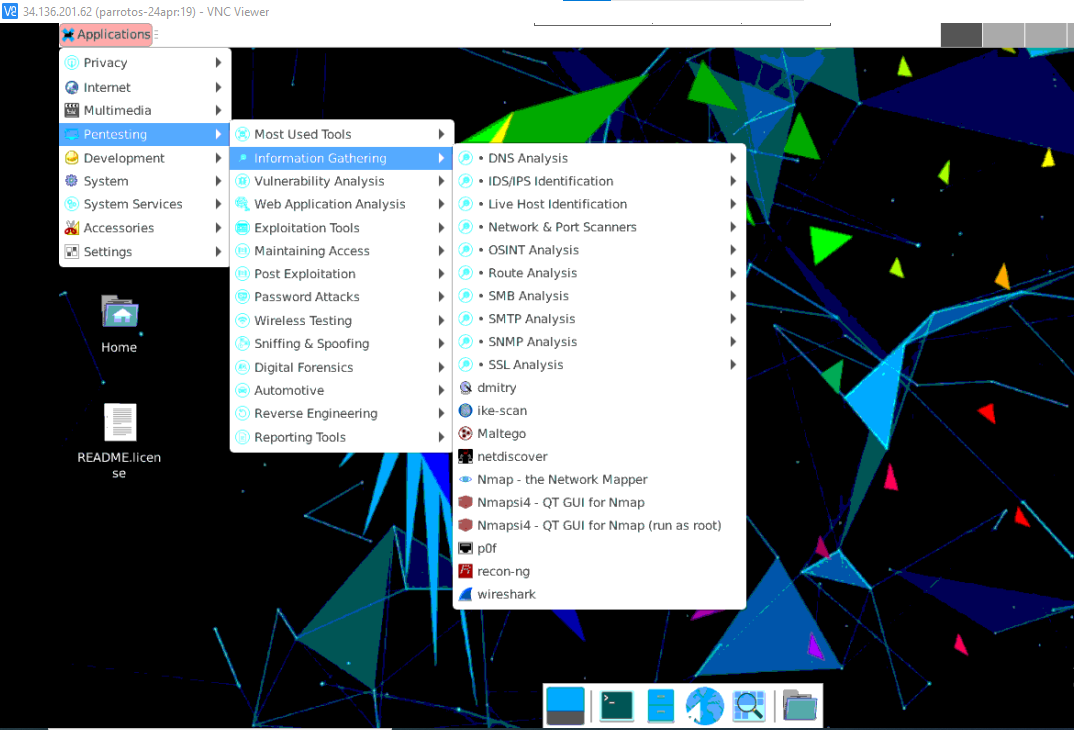
Now you are connected to of box ParrotOS Linux environment which comes with preinstalled ParrotOS programs.
Conclusion
In conclusion, this article provided a step-by-step guide on how to install, set up, and run ParrotOS Linux Environment on Amazon Web Services (AWS). ParrotOS Linux is a free and open-source distribution based on Debian, designed for security experts and professionals in fields such as computer forensics, reverse engineering, hacking, penetration testing, anonymity, privacy, and cryptography.
Overall, the guide aimed to assist users in setting up a ParrotOS Linux environment on AWS, enabling them to leverage the power of both the operating system and the cloud computing platform for their security and penetration testing needs.