How to Setup Ethereum Full Node With POS ON GCP(Google Cloud Platform)
How to Setup Ethereum Full Node With POS ON GCP(Google Cloud Platform)

Bringing the latest tech to grow your business. AWS, GCP & Azure registered partner and cloud solution provider on latest tech.
Introduction
Ethereum Full Node With POS implies a full node setup of the Ethereum blockchain which is capable of participating in the Ethereum network’s POS (Proof-of-Stake) consensus mechanism.
In Ethereum’s upcoming upgrade, known as Ethereum 2.0, the current Proof-of-Work (PoW) mechanism is replaced with Proof-of-Stake. This means that instead of miners validating transactions, validators will stake their Ether to participate in block production and transaction validation.
Running a full node with POS requires a significant amount of Ether as a stake, which is used to participate in the consensus mechanism. In return, validators earn rewards for creating and validating blocks.
By running a Full Node with POS, users can contribute to the network and participate in the consensus mechanism, while also enjoying the benefits of enhanced security and speed. Additionally, validators can earn Ether rewards for their contributions, making it an attractive option for those with significant amounts of Ether.
In this article, we will introduce five topics
Ethereum — Ethereum is an open-source, decentralized blockchain platform that features smart contracts. It is the second-largest cryptocurrency by market capitalization after Bitcoin. Ethereum was proposed by Vitalik Buterin in 2013 and launched in 2015. Ethereum enables developers to build decentralized applications (DApps) on top of its blockchain network.
Ethereum Full Nodes— In Ethereum, a full node is a node (Computer) with a fully synced Ethereum blockchain/laser.
POS(Proof-of-Stake)— POS stands for Proof of Stake, which is a consensus mechanism or algorithm that is used by blockchain networks, including Ethereum, to validate transactions and add new blocks to the chain.
GCP(Google Cloud Platform) — Google Cloud Platform (GCP) is a suite of cloud computing services offered by Google.
Step by Step guide — Guide on how to set up Stable Diffusion on GCP.
What is Ethereum Full Nodes?
A full node is a type of Ethereum node that contains a complete copy of the Ethereum blockchain, with all transaction records, smart contracts, and account balances that have ever been executed on the network.
Full nodes play a critical role in the Ethereum network by validating and relaying transactions, executing smart contracts, and participating in the network’s consensus mechanism.
Running a full node allows users to have complete control and autonomy over their Ethereum transactions and the data they interact with on the network, rather than relying on centralized services.
Full nodes can be resource-intensive and require significant storage, computational power, and bandwidth to operate effectively.
By running a full node, users can contribute to the decentralization and security of the Ethereum network, as well as gain a deeper understanding of how the network operates.
What is POS(Proof-of-Stake)?
Eth2: Ethereum’s transition to PoS started with the inception of Eth2 (Ethereum 2.0), which is the latest iteration of Ethereum. It aims to ditch the PoW consensus mechanism and move to PoS to facilitate a more scalable, secure, and energy-efficient network.
Validator Node: To participate in the network’s PoS model, nodes need to become validator nodes by staking 32 ETH. Validators are responsible for validating blocks, and they are rewarded accordingly.
Random Node Selection: In Ethereum’s PoS model, validators are randomly selected to submit a new block. The stakes held by individual validators influence their chances of being selected.
Incentive Mechanism: Ethereum’s PoS model rewards validators for contributing to the network’s security by paying out transaction fees and inflationary rewards through Ethereum’s native cryptocurrency, ETH. Validators who break the rules or act maliciously will lose their stake, thereby discouraging fraudulent activity.
Current Stage: The current stage of Ethereum’s PoS transition is called the Beacon Chain. It acts as a bridge between the existing PoW chain and the new PoS version. Validators in the Beacon Chain are responsible for validating the chain’s transactions and maintaining consensus. The full transition to PoS will be completed in later phases of Ethereum’s development roadmap.
Step by Step Guide to install, setup, and run Ethereum Full Node With POS ON GCP(Google Cloud Platform)
This step-by-step guide describes how to launch and connect to Techlatest’s Ethereum Full Node With POS ON GCP(Google Cloud Platform)
Note
If you want to save time in setting up an Ethereum Full Node with POS fully synced environment, you can opt for Techlatest Ethereum Full Node with POS, available on the GCP marketplace. By launching and connecting to Techlatest’s Ethereum Full Node with POS on GCP, users can set up their synced environment in a few minutes, rather than going through a lengthy installation and syncing process which takes days to sync several GBs of ledger data and costs hundreds of dollars in bandwidth cost.
- Step 1
First, create a GCP account if you don’t have one already.
- Step 2
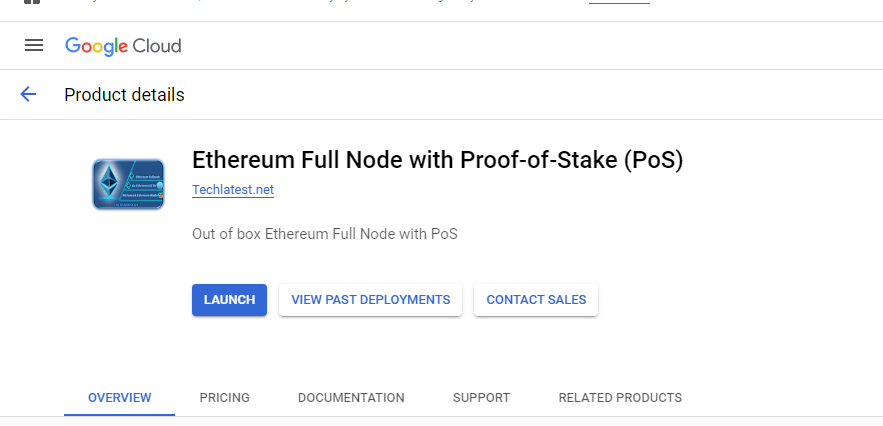
Open Ethereum Full Node With POS ON GCP listing on GCP Marketplace.
- Step 3
After this click on the Launch Button.

- Step 4
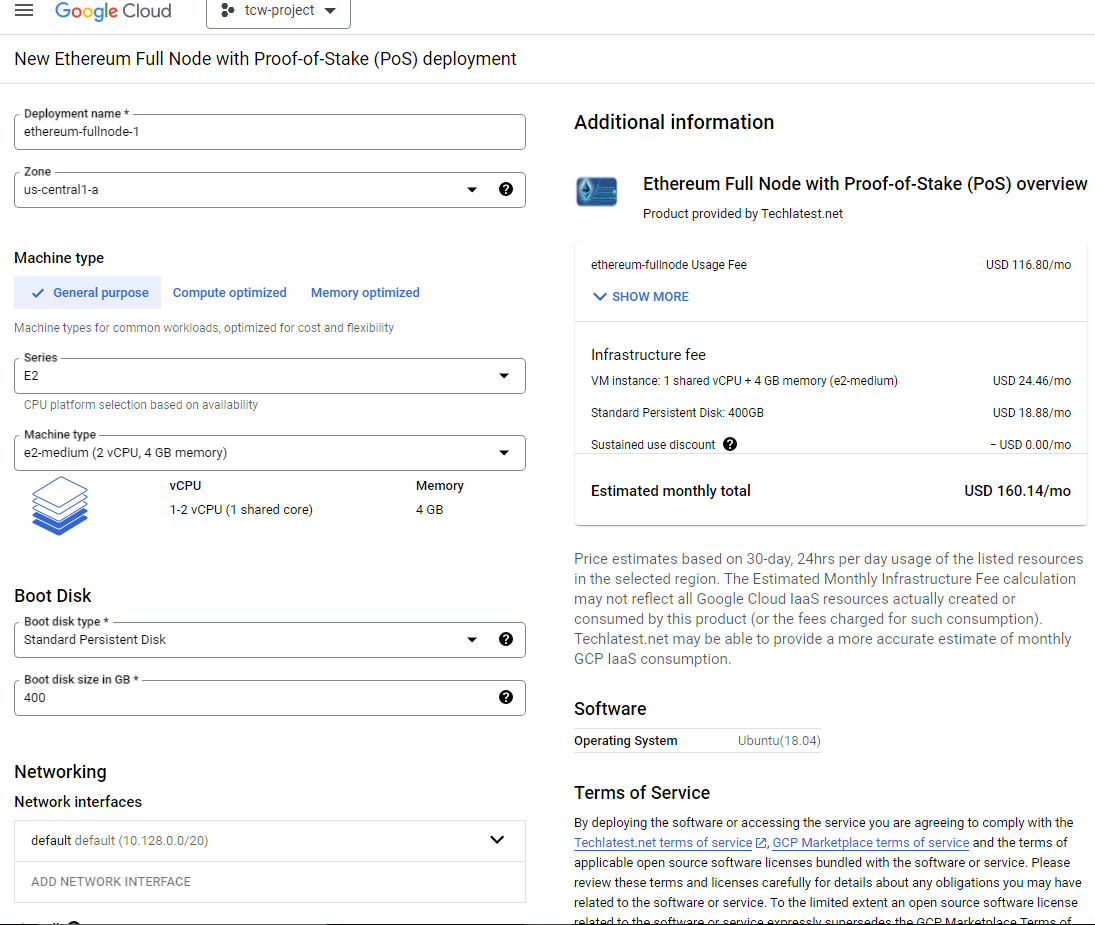
In the GCP console, navigate to Compute Engine → VM instances and click on the “Create Instance” button. Give your instance a name, select a zone, and choose the machine type.
- Step 5
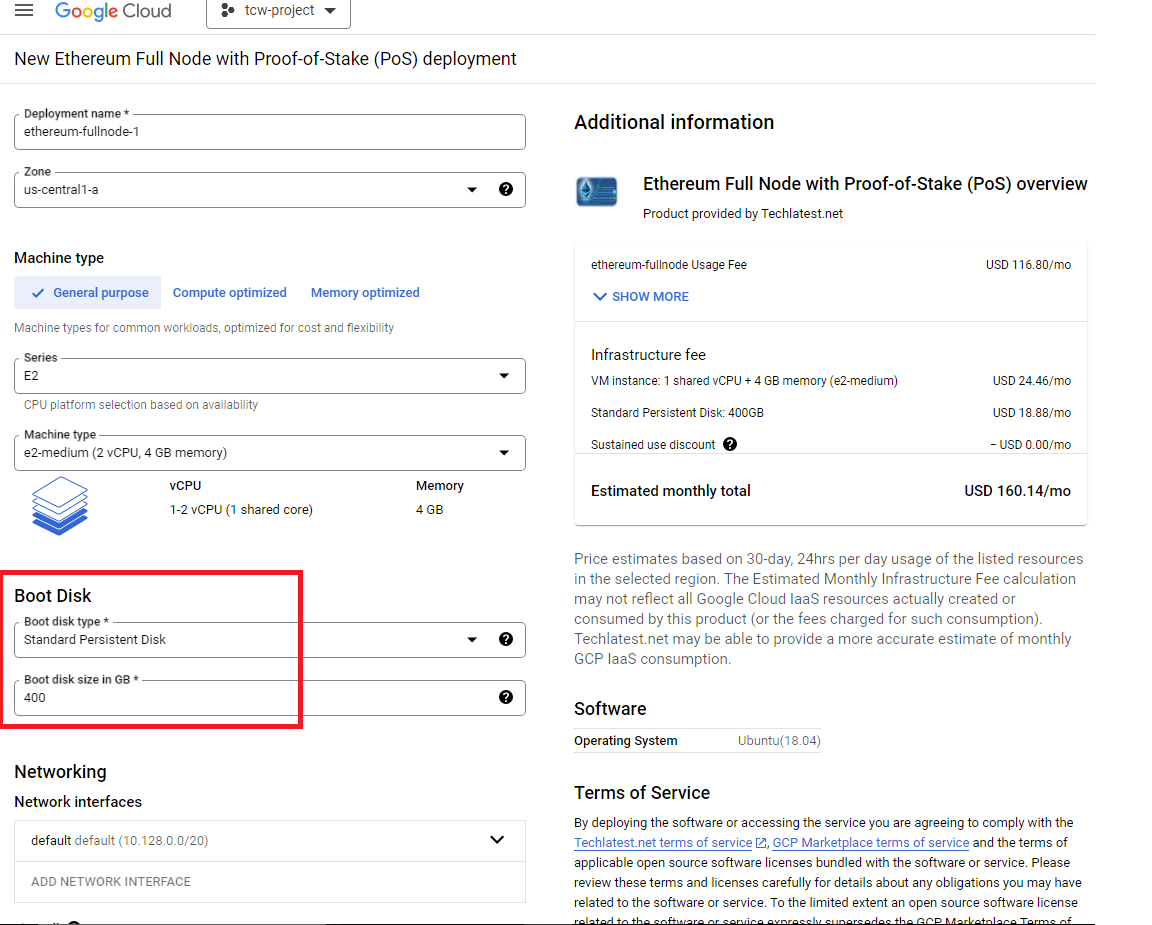
Under the “Boot Disk” section, select “Change” and choose “Container-Optimized OS” as your operating system.
Step 6
Optionally change the number of cores and amount of memory. ( This defaults to 2 vCPUs and 4 GB ram)
Optionally change the boot disk type and size. (This defaults to ‘Standard Persistent Disk’ and size 400 GB respectively. For zone, you must select us-central1-a. The VM can be deployed only in us-central1-a)
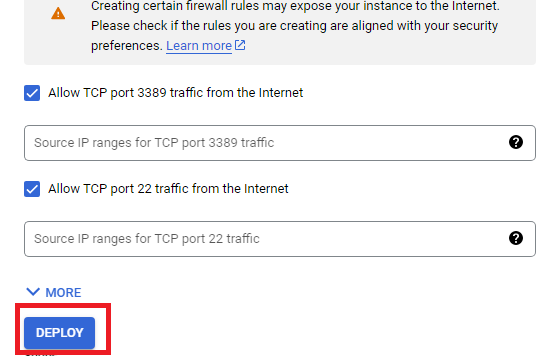
Optionally change the network name and subnetwork names. Be sure that whichever network you specify has ports 22 (for ssh) and 3389 (for RDP) exposed.
- Step 7
Once you are done with the above steps, Click on the Deploy Button.
- Step 8
You can see this summary page when the compute engine is successfully deployed. Click on the Instance link to go to the instance page.
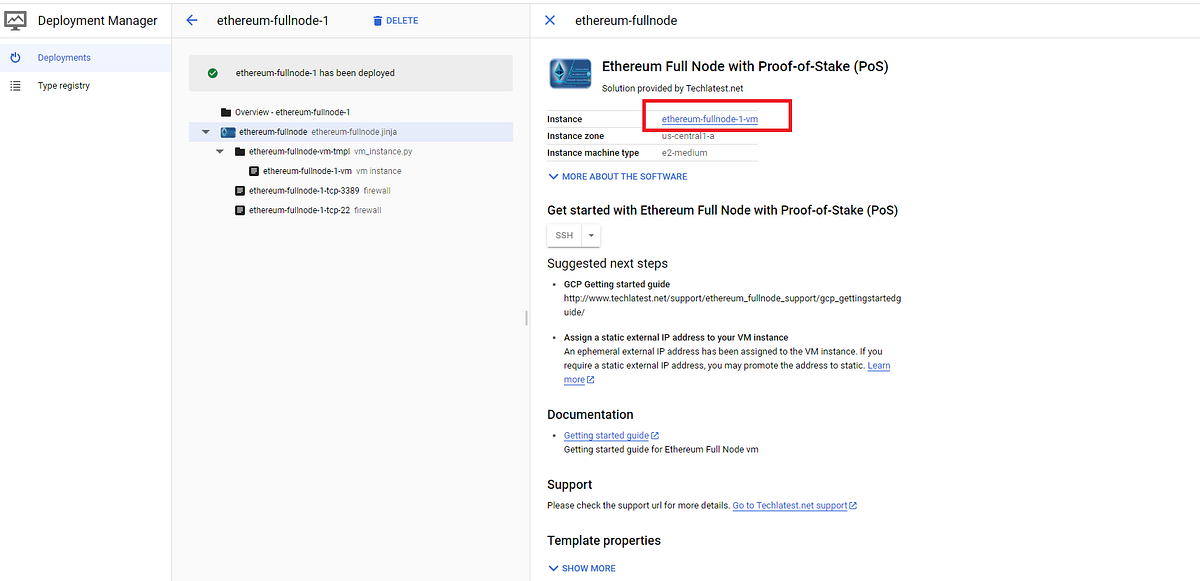
- Step 9
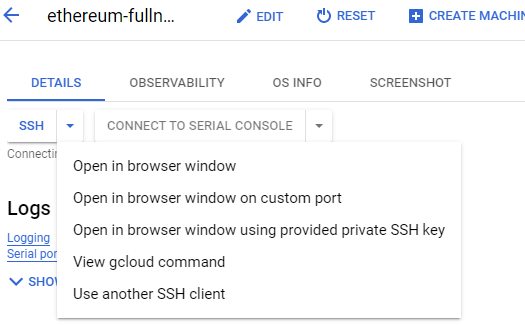
On the instance page, click on the “SSH” button, and select “Open in a browser window”.
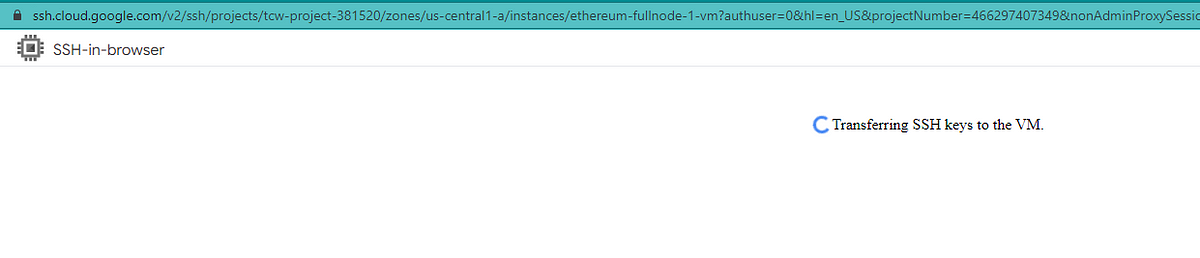
- Step 10
This will open an SSH window in a browser.
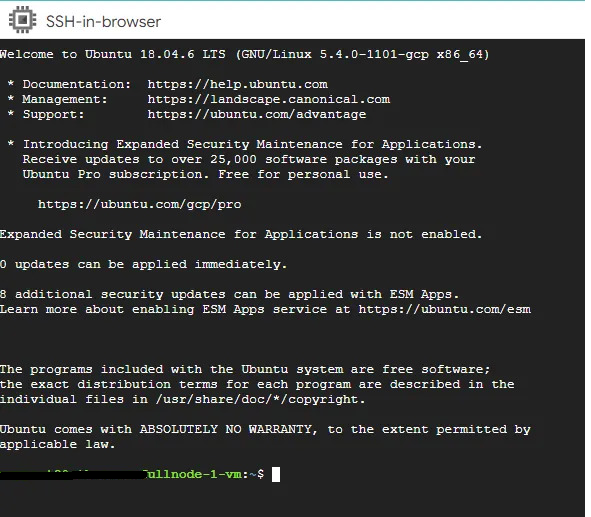
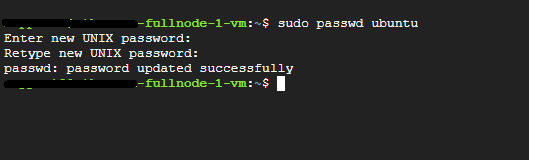
- Step 11
Run the below command to set the password for the “Ubuntu” user. After Running this Command in the Terminal Your password is Updated.
sudo passwd ubuntu
- Step 12
Now the password for the Ubuntu user is set, you can connect to the VM’s desktop environment from any local Windows machine using RDP or Linux machine using Remmina.
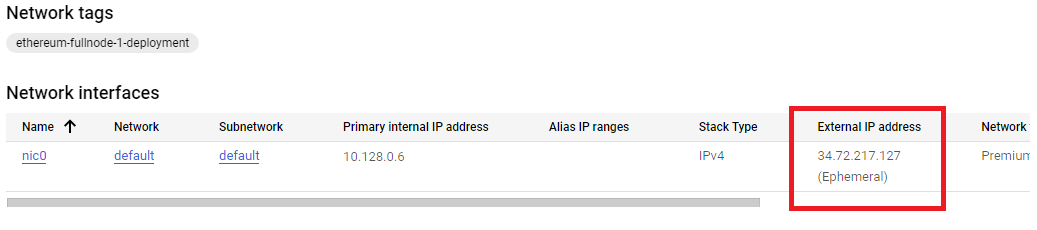
- Step 13
To connect using RDP via Windows machine, first, note the external IP of the VM from the VM details page as highlighted below.
- Step 14
Then From your local Windows machine, go to the “start” menu, in the search box type and select “Remote desktop connection”.
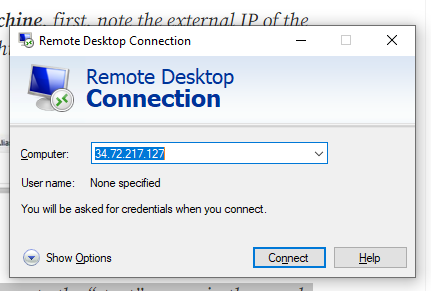
- Step 15
In the “Remote Desktop Connection” wizard, paste the external IP address and click on the connect Button.
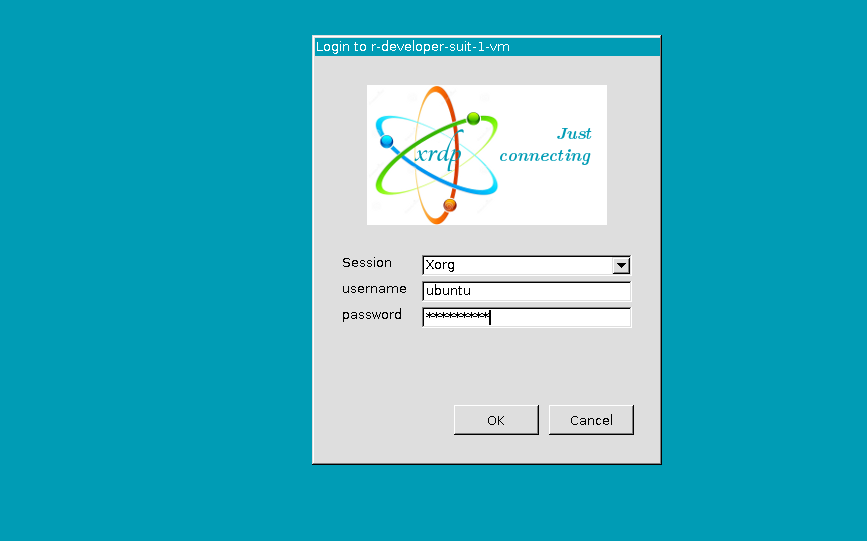
- Step 16
This will connect you to the VM’s desktop environment. Provide “ubuntu” as the user id and the password set in step 11 to authenticate. Click on the OK Button.
- Step 17
Now you are connected to VM via Windows machines.
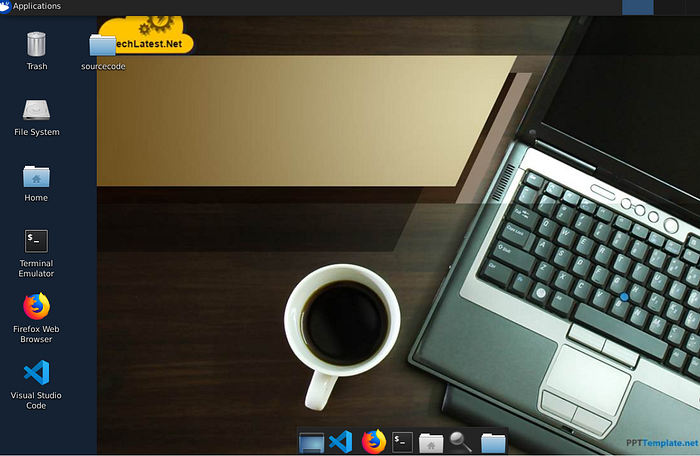
- Step 18
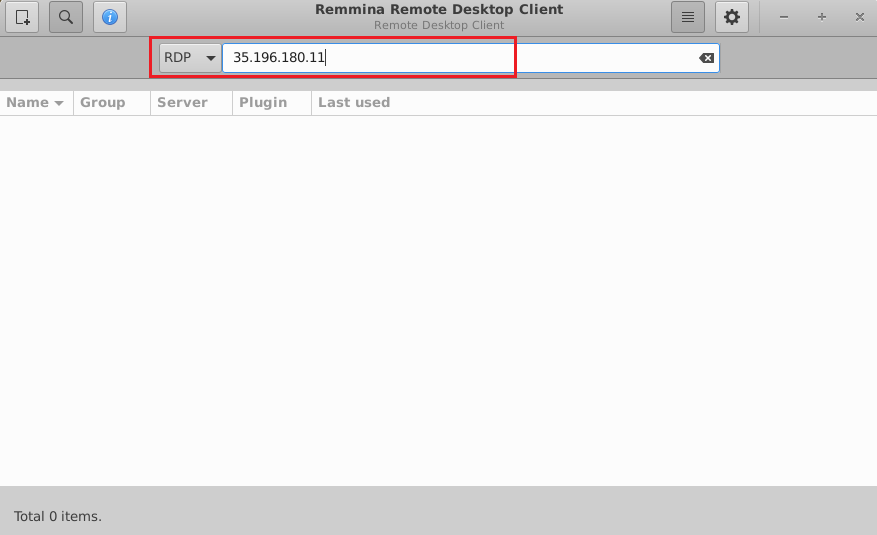
To connect using RDP via Linux machine, first note the external IP of the VM from the VM details page, then from your local Linux machine, goto the menu, in the search box type and select “Remmina”.
Note: If you don’t have Remmina installed on your Linux machine, first Install Remmina as per your Linux distribution.

- Step 19
In the “Remmina Remote Desktop Client” wizard, select the RDP option from the dropdown and paste the external IP and click enter.
- Step 20
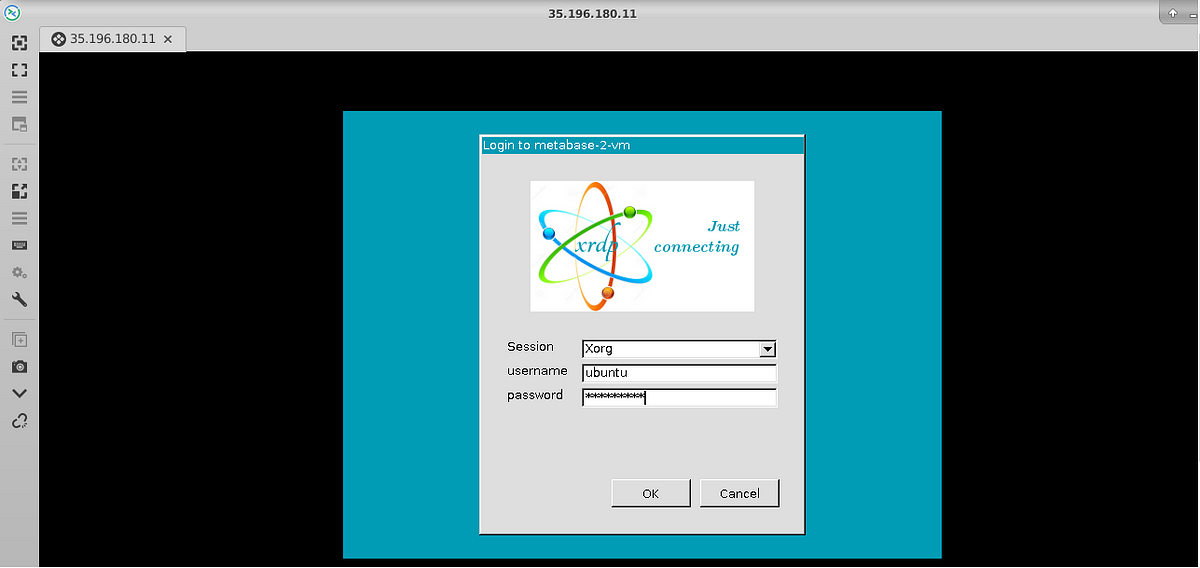
This will connect you to the VM’s desktop environment. Provide “ubuntu” as the user-id and the password set in step 11 to authenticate. Click OK.
- Step 21
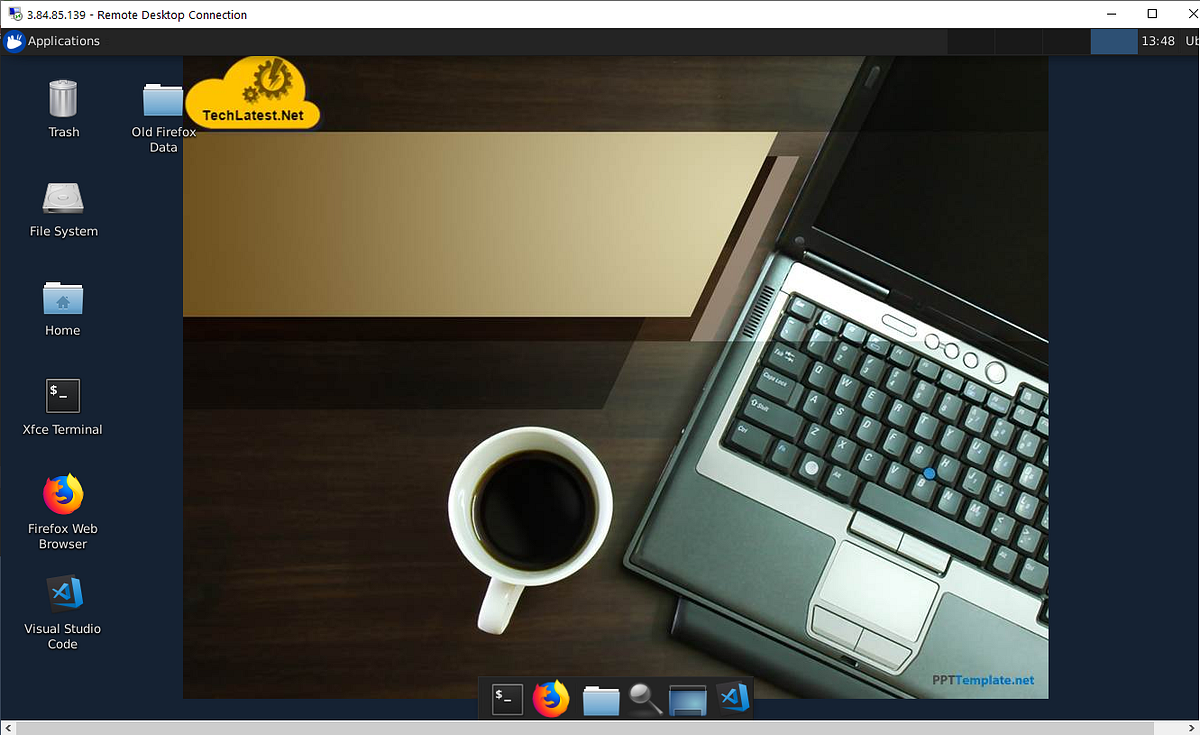
Now you are connected to out-of-box Ethereum Full Node with PoS environment via Linux machine.
- Step 22
Ethereum home directory location is /home/ubuntu/Ethereum.
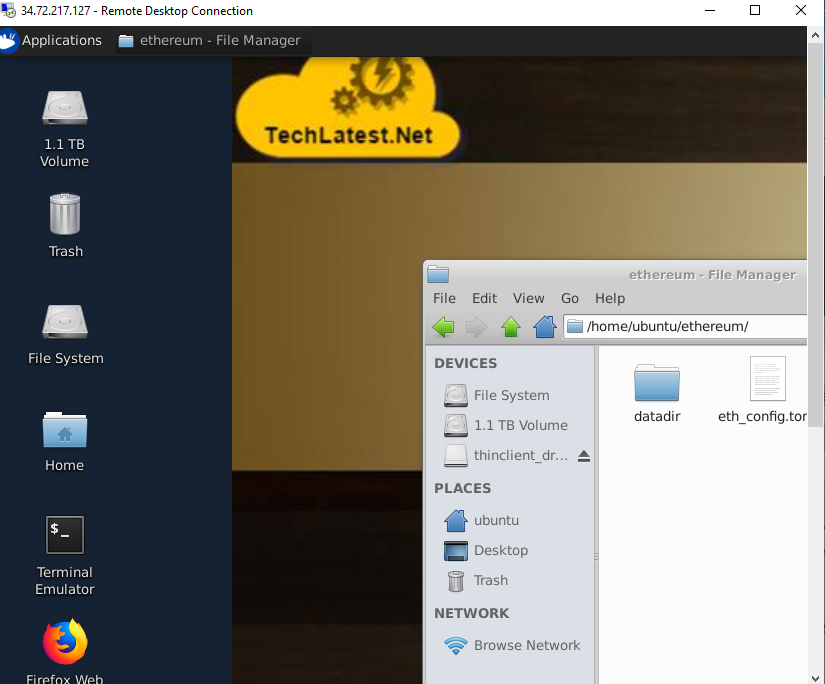
- Step 23
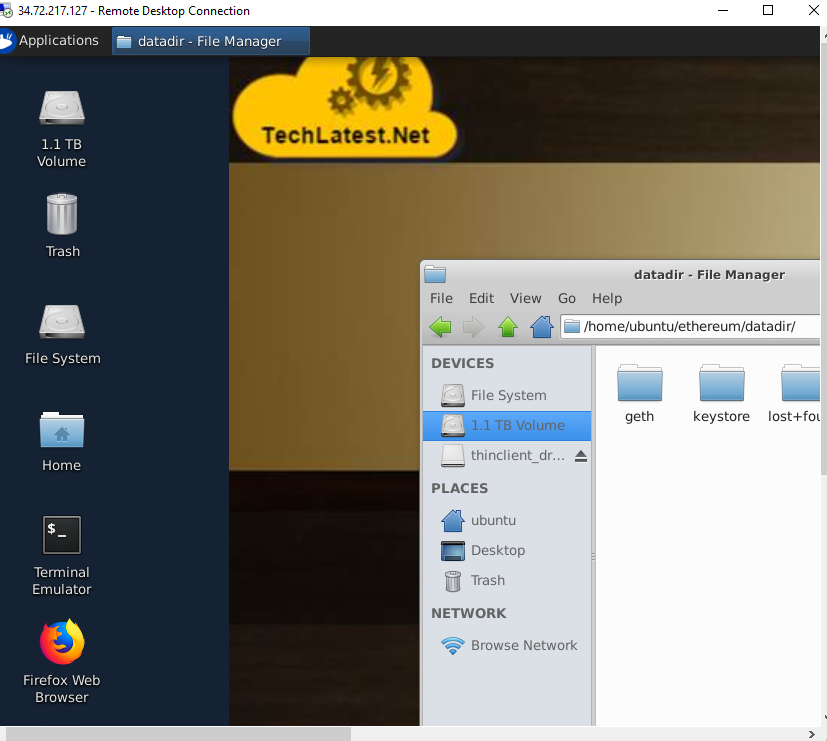
The data directory location is /home/ubuntu/Ethereum/data-dir.
- Step 24
Monitoring and managing node sync process :
The VM automatically starts the sync process on startup. To verify if the sync is in progress, run the below commands
ps -ef|grep geth
If sync is in progress, you will see the below-highlighted process running

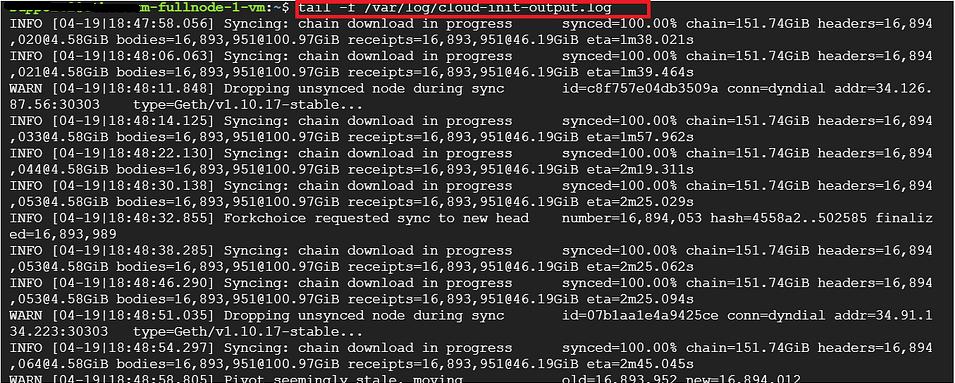
You can also verify the sync process by monitoring the sync log as shown below the tail.
tail -f /var/log/cloud-init-output.log
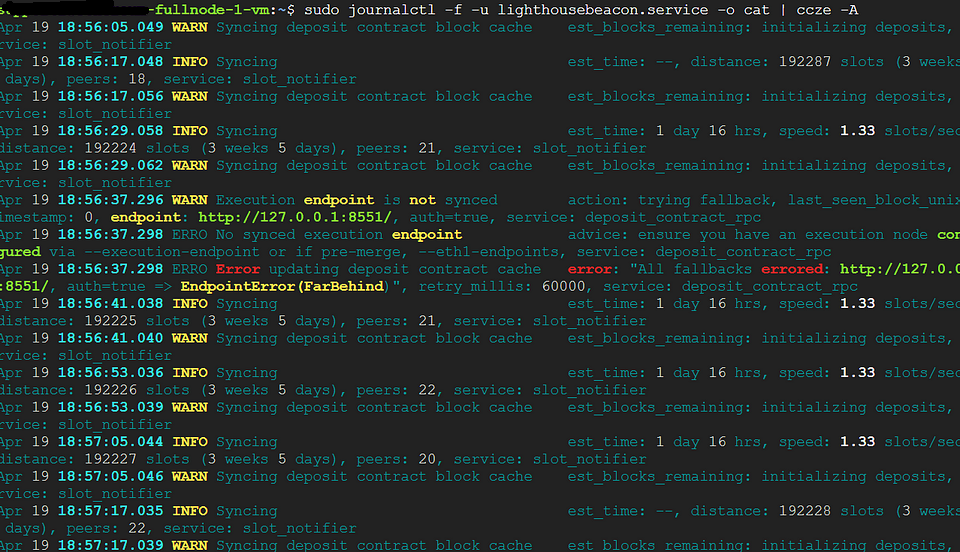
You can monitor the lighthouse logs by running the below command.
Note: If you encounter a JWT authorization error or connection refused error while running the below command, please follow Lighthouse Troubleshooting Guide. to fix them.
sudo journalctl -f -u lighthousebeacon.service -o cat | ccze -A
To stop the sync process, simply run the below command :
sudo killall -HUP geth

To restart the sync process, run the below command.

- Step 25
Tracking sync progress
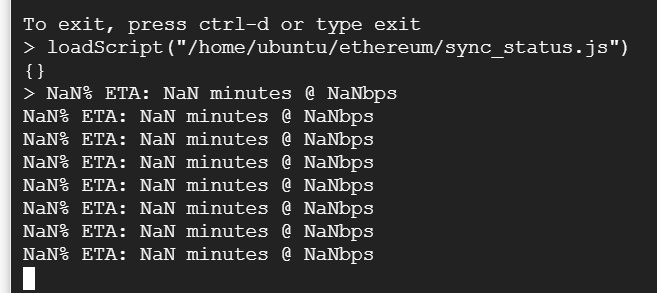
You can track the sync progress by attaching it to the running geth console and running the monitoring script as shown below. Note that if the progress is shown as 99% then the node is mostly synced:
sudo geth attach --datadir /home/ubuntu/ethereum/datadir/

this will connect to the console, and then run
loadScript("/home/ubuntu/ethereum/sync_status.js")
- Step 26
Accessing Metamask Ethereum wallet
The VM comes with Metamask the most popular Ethereum wallet, preinstalled in the Firefox browser. Connect to the VM via Remote desktop, open the Firefox Browser and you will see the metamask plugin in the browser.

- Step 27
Click on the Metamask icon, and complete the configuration by following the instructions.
Once the Metamask is configured, you will see Metamask is running on Ethereum Mainnet Network.
- Step 28
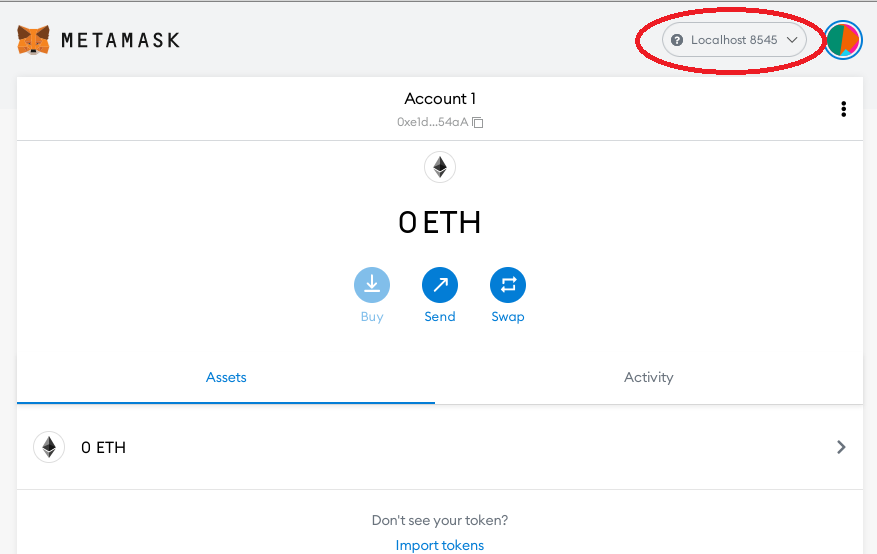
If you want to connect Metamask on localhost, select localhost 8545 from the Metamask Network dropdown. You should be able to connect to localhost as shown:
- Step 29
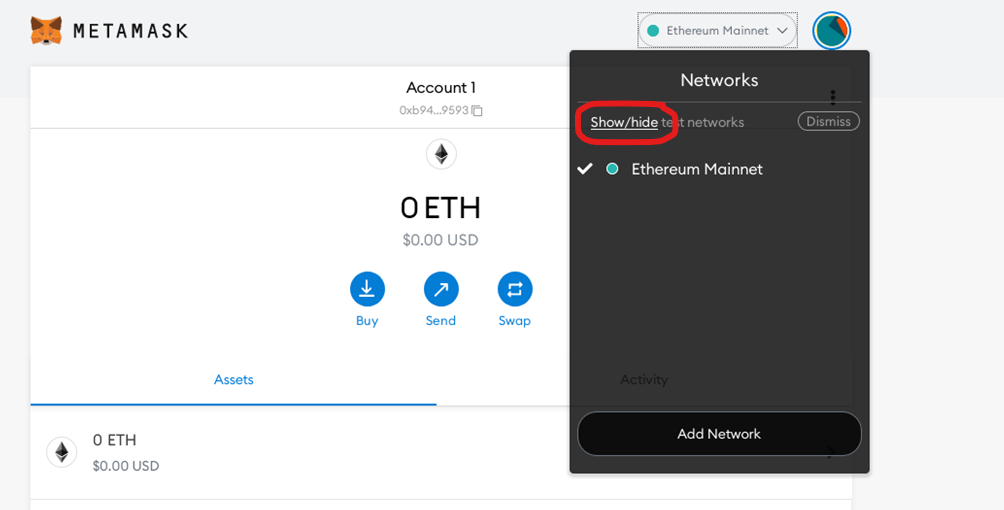
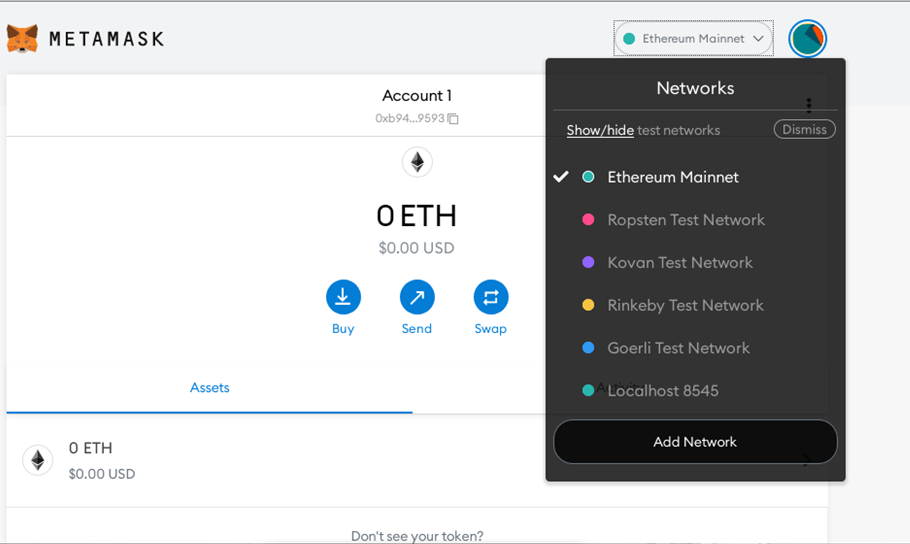
If you don’t see localhost and other test network options under the network dropdown, please click on the show/hide link as shown below:
- Step 30
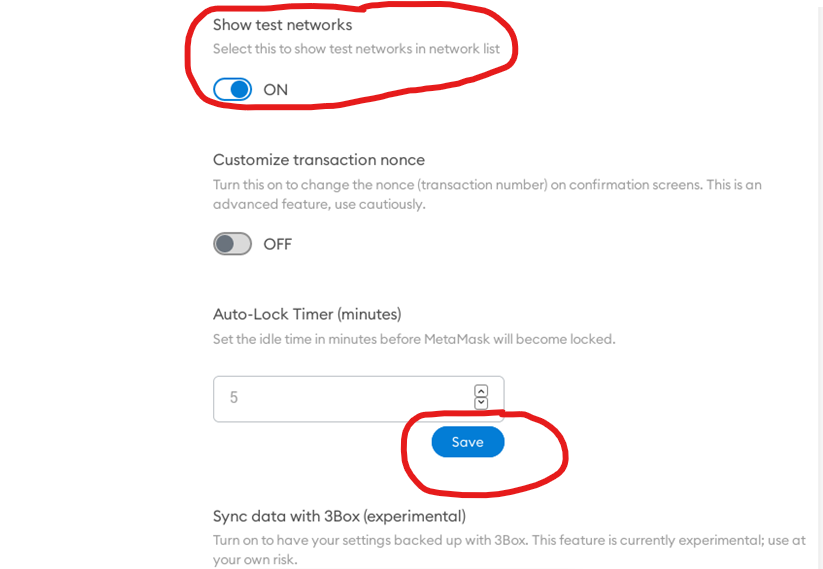
It will take you to the set menu. Here you enable the show test network option and save the changes.
- Step 31
Close the setting page and reopen the network dropdown. Now you should be able to see all the test networks.
Conclusion
In this blog, we have discussed Ethereum Full Nodes, and POS consensus mechanism, on GCP (Google Cloud Platform), and provided a step-by-step guide to install, set up, and run Ethereum Full Node with POS on GCP. Running a Full Node with POS allows users to participate in the consensus mechanism and earn Ether rewards while contributing to the network’s decentralization and security. By launching and connecting to Techlatest’s Ethereum Full Node with POS on GCP, users can set up their synced environment in a few minutes, rather than going through a lengthy installation process. The guide includes instructions on how to track sync progress, access the Metamask Ethereum wallet, and troubleshoot possible errors. Overall, this article provides useful information and clear instructions for those interested in contributing to the Ethereum network through Full Nodes with POS.


