How To Get Jupyter Python Notebook On AWS(Amazon Web Services)
How To Get Jupyter Python Notebook On AWS(Amazon Web Services)

Bringing the latest tech to grow your business. AWS, GCP & Azure registered partner and cloud solution provider on latest tech.
Introduction
Jupyter Notebook is an open-source web application that allows you to create and share documents that contain live code, equations, visualizations, and explanatory text. It provides an interactive computing environment that supports multiple programming languages, including Python, R, Julia, and more.
Jupyter Notebook is based on IPython, which is an enhanced interactive Python shell. The name “Jupyter” is derived from the combination of three core programming languages supported by the notebook: Julia, Python, and R.
The main feature of Jupyter Notebook is the ability to create and run code cells interactively. Each code cell can contain code snippets that can be executed individually, allowing you to see the output or results directly below the code cell. This interactivity makes it convenient for prototyping, data exploration, and data analysis tasks.
In this article, we will introduce three topics
What is Jupyter Notebook & its key features — Jupyter Notebook is an open-source web app for creating and sharing documents with live code, visualizations, and text. It provides an interactive environment for data analysis, prototyping, and collaboration, supporting various programming languages and enabling easy sharing with others.
Jupyter Python Notebook — All things about Jupyter Python Notebook which is provided by Techlatest.net on AWS.
Step by Step guide — Guide on how to set up Jupyter Python Notebook On AWS(Amazon Web Services).
Key features of Python Jupyter Notebook include:
1. Interactive Computing: Jupyter Notebook allows you to write and execute code cells interactively. You can run code snippets line by line or execute an entire cell at once. This interactive environment is ideal for exploratory data analysis, prototyping, and experimenting with code.
2. Multiple Programming Languages: Jupyter Notebook supports multiple programming languages, including Python, R, Julia, and others. This flexibility allows you to work with different languages within the same notebook and leverage the strengths of each language for various tasks.
3. Rich Output: Jupyter Notebook provides rich output capabilities, allowing you to display text, images, plots, charts, and interactive visualizations directly in the notebook. You can visualize data, create informative graphs, and generate interactive widgets to enhance your analysis and presentations.
4. Markdown Support: Jupyter Notebook supports Markdown cells, which allow you to write formatted text using Markdown syntax. Markdown cells enable you to provide documentation, explanations, or narrative context for your code, making it easier to communicate and share your work.
5. Code Execution: Jupyter Notebook enables you to execute code cells and see the output or results immediately below each cell. This feature helps you understand the impact of each code snippet, check for errors, and iterate on your code in an incremental and interactive manner.
6. Code Snippet Reusability: Jupyter Notebook allows you to define and execute code snippets in any order, making it easy to reuse and modify specific parts of your code. You can also define variables or functions in one cell and use them in subsequent cells, promoting code modularity and reusability.
7. Collaboration and Sharing: Jupyter Notebook files can be easily shared with others. You can share your notebooks as standalone files or publish them online, making it convenient for collaboration and reproducibility. Notebooks can be exported to various formats, such as HTML, PDF, or Python scripts, allowing others to view and run your code without requiring Jupyter Notebook.
8. Extensions and Customization: Jupyter Notebook supports extensions that enhance its functionality and provide additional features. These extensions enable you to customize the notebook environment, add new capabilities, and integrate with external tools and libraries.
9. Integration with Data Science Libraries: Jupyter Notebook integrates well with popular data science libraries and frameworks, such as NumPy, Pandas, matplotlib, and sci-kit-learn. You can import these libraries and use them directly in your notebook, leveraging their powerful data manipulation, analysis, and visualization capabilities.
10. Reproducible Research: Jupyter Notebook promotes reproducibility in research and data analysis. Combining code, documentation, and results in a single document, allows others to understand and replicate your work easily. Notebooks can serve as a comprehensive record of your analysis process, making it easier to track and reproduce your findings.
These key features make Python Jupyter Notebook a versatile tool for interactive computing, data exploration, collaboration, and sharing of code and results.
Jupyter Python Notebook by Techlatest
Jupyter Notebook preinstalled for immediate use.
Accessible from anywhere and anytime through JupyterHub.
Multiple users can collaborate simultaneously.
Popular Python libraries and working demos for AI and Machine Learning are included.
The graphical user interface for easy access to VM and management of files and Jupyter environment.
Step by Step Guide to install, and setup Jupyter Python Notebook On AWS(Amazon Web Services)
Note: If you are setting up Jupyter Notebook to train and/or run AI & Machine Learning models, you will have to choose GPU based VM to meet the computing requirements. Choosing a CPU-based VM will result in performance bottlenecks.
Below is the step-by-step guide to install & set up Techlatest`s Jupyter Python Notebook.
- Step 1
Open Jupyter Python Notebook VM listing on the AWS marketplace.
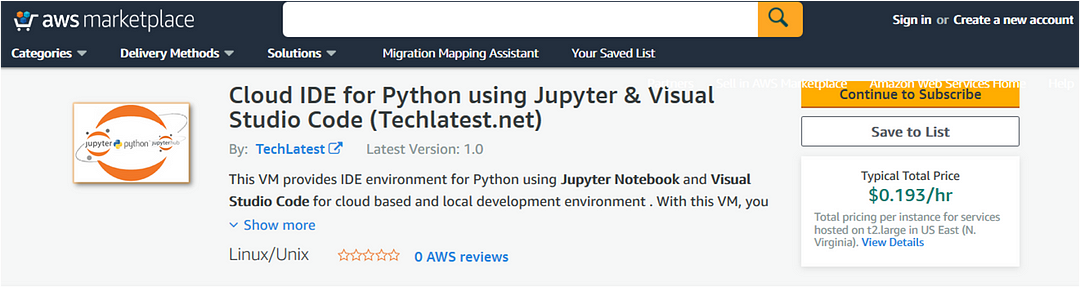
- Step 2
Click on the Continue to subscribe Button.
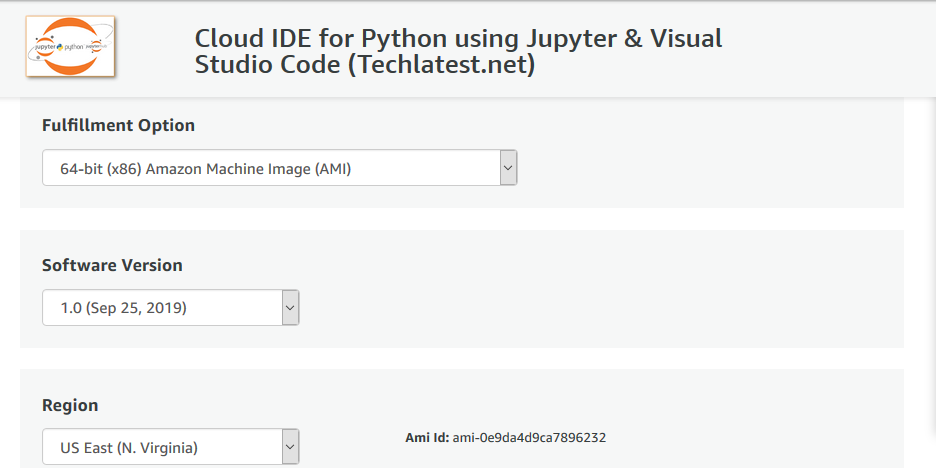
Log in with your credentials and follow the instruction. Click on the Continue to Configuration Button.
Select a Region where you want to launch the VM(such as US East (N.Virginia)).
Choose Action: You can launch it through EC2 or from Website. (Let’s choose Launch from the website).
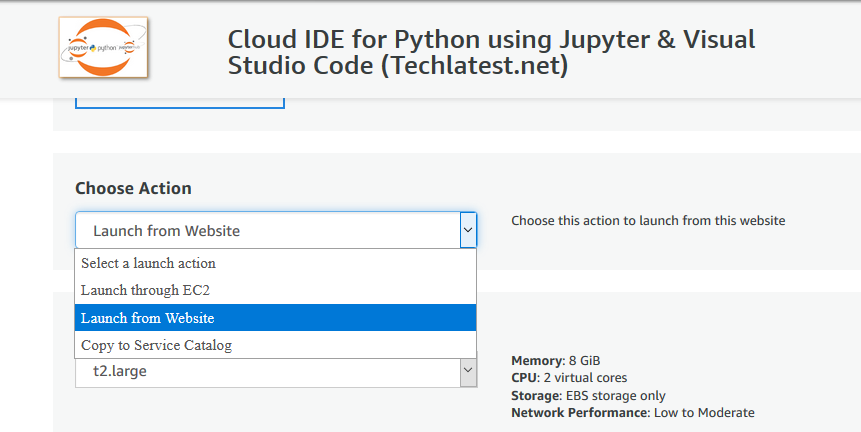
Optionally change the EC2 instance type. (This defaults to t2.large instance type, 2 vCPUs and 8 GB RAM).
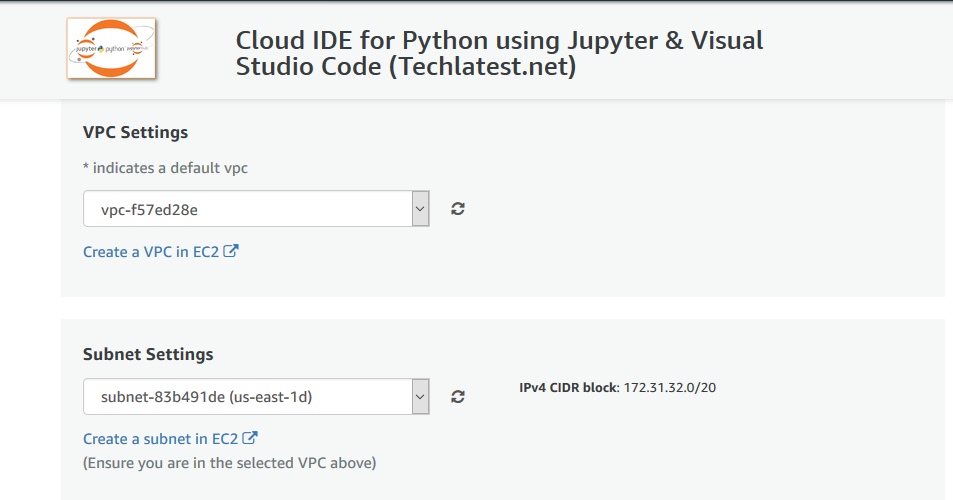
Optionally change the network name and subnetwork names.
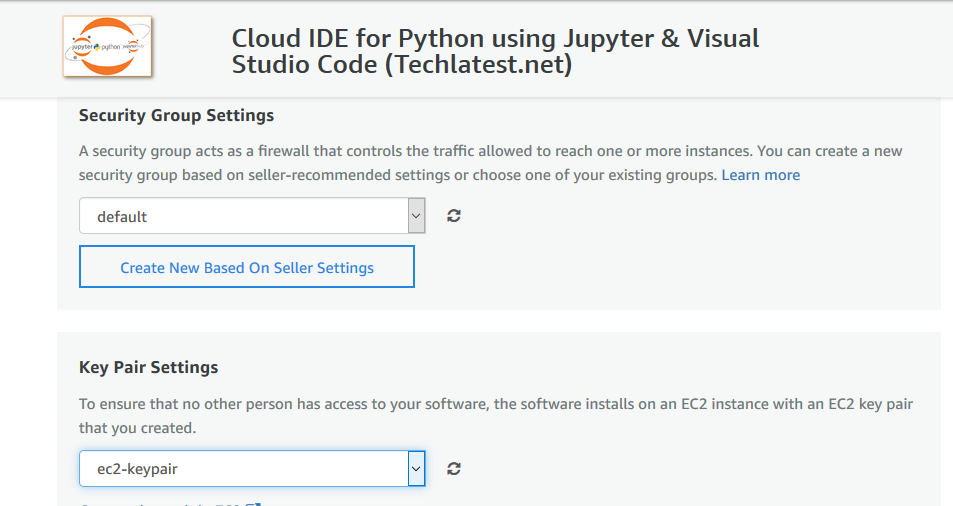
Select the Security Group. Be sure that whichever Security Group you specify has ports 22 (for SSH), 3389 (for RDP) and 80 (for HTTP) exposed.
Be sure to download the key pair which is available by default, or you can create the new key pair and download it.
Click on the Launch Button.
Jupyter Python Notebook will start deploying.
- Step 3
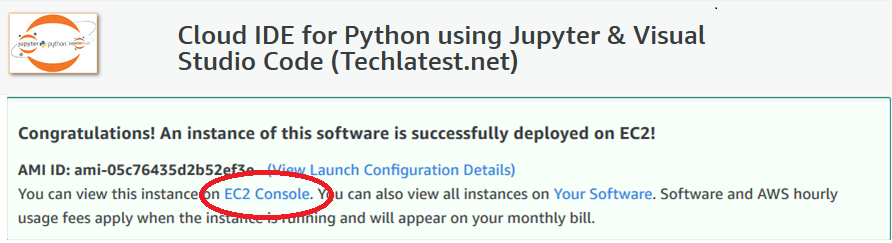
A summary page is displayed. To see this instance on EC2 Console click on EC2 Console link.
- Step 4
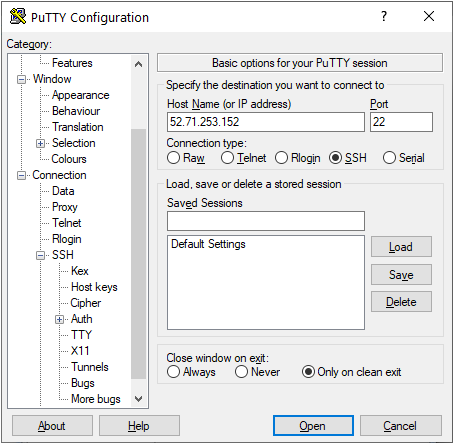
On the EC2 Console page, the instance is up and running. To connect to this instance through putty, copy the IPv4 Public IP Address.

- Step 5
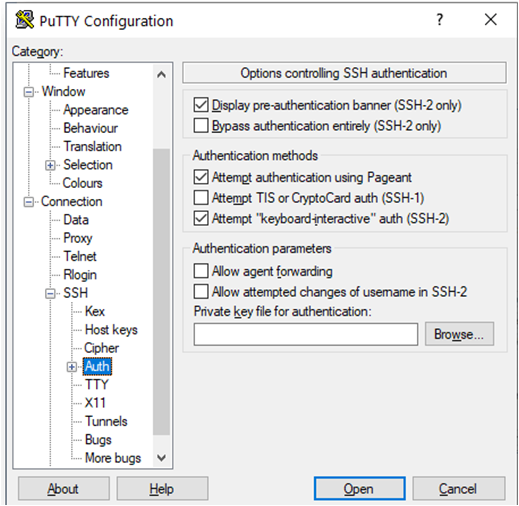
Open Putty, paste the IP address and browse the private key you downloaded while deploying the VM, by going to SSH->Auth, click on Open Button. Enter ubuntu as user-id.
- Step 6
Once connected, change the password for the Ubuntu user using the below command.
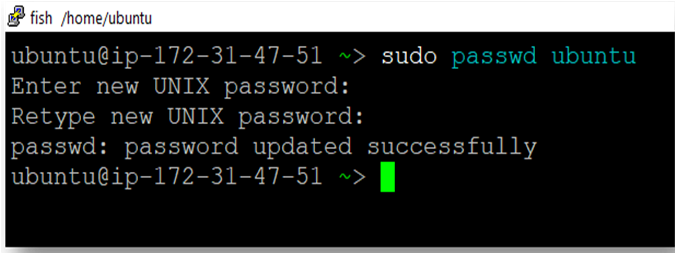
sudo passwd ubuntu
- Step 7
Now the password for Ubuntu users is set, you can connect to the VM’s desktop environment from any local Windows Machine using RDP protocol or Linux Machine using Remmina.
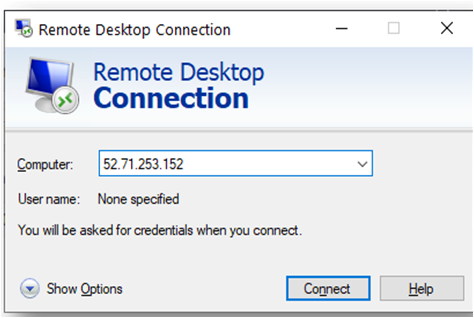
From your local Windows machine, go to the “start” menu, in the search box type and select “Remote desktop connection”. In the “Remote Desktop Connection” wizard, copy the public IP address and click on the connect Button.
- Step 8
This will connect you to the VM’s desktop environment. Provide the username (e.g. “ubuntu”) and the password set in the above steps “Reset password” step to authenticate. Click on the OK Button.

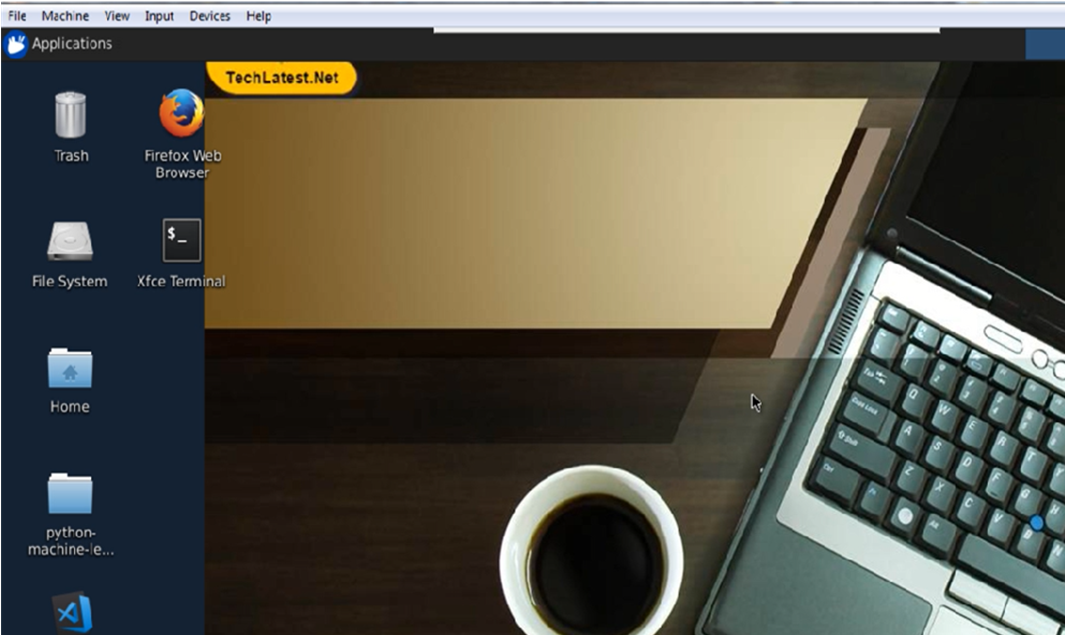
- Step 9
Now you are connected to the out-of-box Jupyter Python Notebook environment via Windows Machine.
- Step 10
You can use the remote desktop you connected in the above step for using the VM, however, a more convenient and better method is to use the Jupyter/Ipython notebook which comes with the VM.
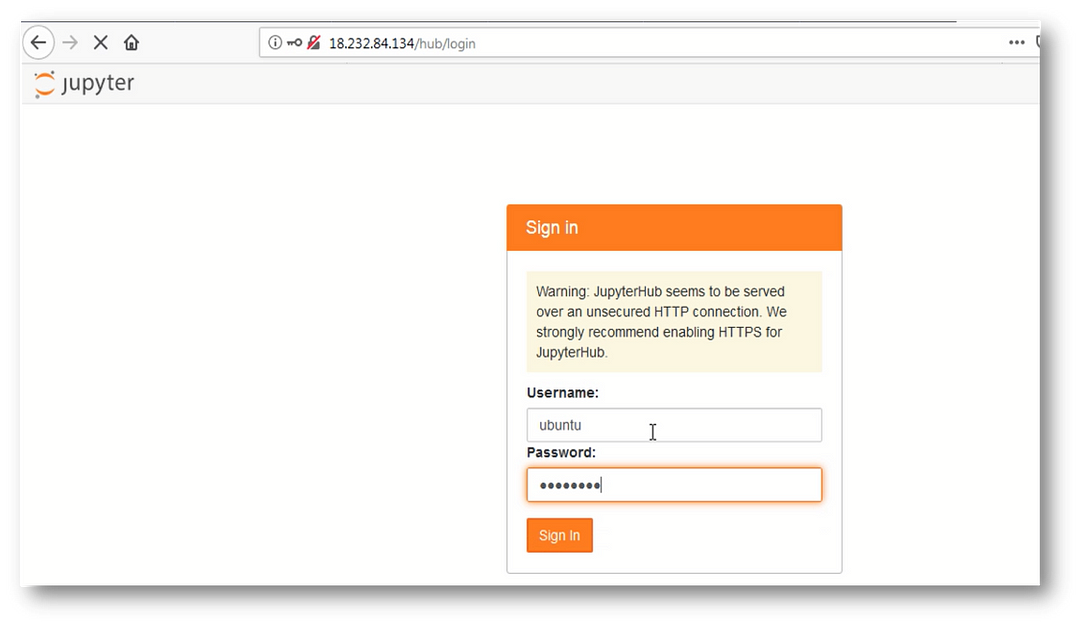
The Notebook is available on the same public IP you used for the remote desktop and accessible via any browser. Just open the browser and type the public IP address and you will get the below screen for login. Use “ubuntu” as the username and the password you set to log in.
Note: Make sure you use “http” and not “https” in the URL.
Conclusion
To summarize, Jupyter Notebook is an open-source web application that supports interactive computing for creating and sharing documents that contain live code, visualizations, and explanatory text. It’s a versatile tool that supports multiple programming languages, including Python, R, and Julia, and provides a rich output capability that enables the visualization of data, generating interactive widgets to enhance analysis and presentations.
Setting up Jupyter Python Notebook on AWS involves a few simple steps, including launching the Jupyter Python Notebook VM listing, choosing a region, and choosing an instance type and security group, among others. After deploying, users can log in to the Notebook via SSH or remote desktop and access the Notebook via any browser using the public IP address. The key features of the Jupyter Notebook, as outlined in this article, make it an indispensable tool for data scientists, researchers, and developers who require an interactive computing environment for their projects.