How to Enable Multiuser Access to Jupyter Notebook
How to Enable Multiuser Access to Jupyter Notebook

Bringing the latest tech to grow your business. AWS, GCP & Azure registered partner and cloud solution provider on latest tech.
Introduction
Jupyter Notebook is an open-source web application that allows you to create and share documents that contain live code, equations, visualizations, and explanatory text. It provides an interactive computing environment that supports multiple programming languages, including Python, R, Julia, and more.
Jupyter Notebook is based on IPython, which is an enhanced interactive Python shell. The name “Jupyter” is derived from the combination of three core programming languages supported by the notebook: Julia, Python, and R.
The main feature of Jupyter Notebook is the ability to create and run code cells interactively. Each code cell can contain code snippets that can be executed individually, allowing you to see the output or results directly below the code cell. This interactivity makes it convenient for prototyping, data exploration, and data analysis tasks.
In this article, we will introduce three topics
Jupyter Python Notebook — All things about Jupyter Python Notebook which is provided by Techlatest.net on GCP.
Benefits of Multiuser Environment — How enabling a multiuser environment will resultant cost savings & better collaboration.
Step by Step guide — Guide on How to enable Multiuser Environment for Jupyter Notebook.
Key features of Python Jupyter Notebook include:
1. Interactive Computing: Jupyter Notebook allows you to write and execute code cells interactively. You can run code snippets line by line or execute an entire cell at once. This interactive environment is ideal for exploratory data analysis, prototyping, and experimenting with code.
2. Multiple Programming Languages: Jupyter Notebook supports multiple programming languages, including Python, R, Julia, and others. This flexibility allows you to work with different languages within the same notebook and leverage the strengths of each language for various tasks.
3. Rich Output: Jupyter Notebook provides rich output capabilities, allowing you to display text, images, plots, charts, and interactive visualizations directly in the notebook. You can visualize data, create informative graphs, and generate interactive widgets to enhance your analysis and presentations.
4. Markdown Support: Jupyter Notebook supports Markdown cells, which allow you to write formatted text using Markdown syntax. Markdown cells enable you to provide documentation, explanations, or narrative context for your code, making it easier to communicate and share your work.
5. Code Execution: Jupyter Notebook enables you to execute code cells and see the output or results immediately below each cell. This feature helps you understand the impact of each code snippet, check for errors, and iterate on your code in an incremental and interactive manner.
6. Code Snippet Reusability: Jupyter Notebook allows you to define and execute code snippets in any order, making it easy to reuse and modify specific parts of your code. You can also define variables or functions in one cell and use them in subsequent cells, promoting code modularity and reusability.
7. Collaboration and Sharing: Jupyter Notebook files can be easily shared with others. You can share your notebooks as standalone files or publish them online, making it convenient for collaboration and reproducibility. Notebooks can be exported to various formats, such as HTML, PDF, or Python scripts, allowing others to view and run your code without requiring Jupyter Notebook.
8. Extensions and Customization: Jupyter Notebook supports extensions that enhance its functionality and provide additional features. These extensions enable you to customize the notebook environment, add new capabilities, and integrate with external tools and libraries.
9. Integration with Data Science Libraries: Jupyter Notebook integrates well with popular data science libraries and frameworks, such as NumPy, Pandas, matplotlib, and sci-kit-learn. You can import these libraries and use them directly in your notebook, leveraging their powerful data manipulation, analysis, and visualization capabilities.
10. Reproducible Research: Jupyter Notebook promotes reproducibility in research and data analysis. Combining code, documentation, and results in a single document, allows others to understand and replicate your work easily. Notebooks can serve as a comprehensive record of your analysis process, making it easier to track and reproduce your findings.
These key features make Python Jupyter Notebook a versatile tool for interactive computing, data exploration, collaboration, and sharing of code and results.
Benefits of Multiuser Environment
Enabling Multiuser Environment will provide you following benefits-
Cost Saving — If You are a team of more than 1 user, a multiuser environment will allow you to share a single virtual machine with all the users, instead of each individual user having his/her own virtual machine. This kind of shared environment will result in significant cost saving especially if you are a big team.
Easier maintenance — Having a single virtual machine for the entire team simplifies VM maintenance and reduces costs compared to managing multiple VMs for individual users.
Enhanced security — JupyterHub enables a multiuser environment where each user has their own isolated workspace, ensuring improved security and privacy for their files and artifacts.
Better collaboration — While each user has their own separate environment, JupyterHub facilitates file and artifact sharing among team members, promoting better collaboration across the team.
Prerequisites
Before doing all the below steps, you can set up a VM for Jupyter Notebook Environment, If you are looking to quickly set up and explore Jupyter Notebook Environment, Techlatest.net provides out-of-the-box setup for Jupyter Notebook for Multiuser Jupyter Environment on AWS, Azure and GCP. Please follow the below links for the step-by-step guide to set up Jupyter Notebook Environment on your choice of cloud platform.
Step by Step Guide to Using Jupyter Notebook & Setting up Multiuser Jupyter Environment
Assumption: Following steps are provided based on the assumption that you are using the Jupyter notebook provided by Techlatest.net as mentioned in the above prerequisites. If you have your own Jupyter notebook, you will have to make necessary changes wherever highlighted in the below steps.
Note: If you are setting up Jupyter Notebook to train and/or run AI & Machine Learning models, you will have to choose GPU based VM to meet the computing requirements. Choosing a CPU-based VM will result in performance bottlenecks.
- Step 1
To add a new user, RDP to your VM, open the terminal and enter the below command.( How to RDP to VM ). If you are not using Techlatest Jupyter VM then you need to use the admin user id of your VM to add the new user.
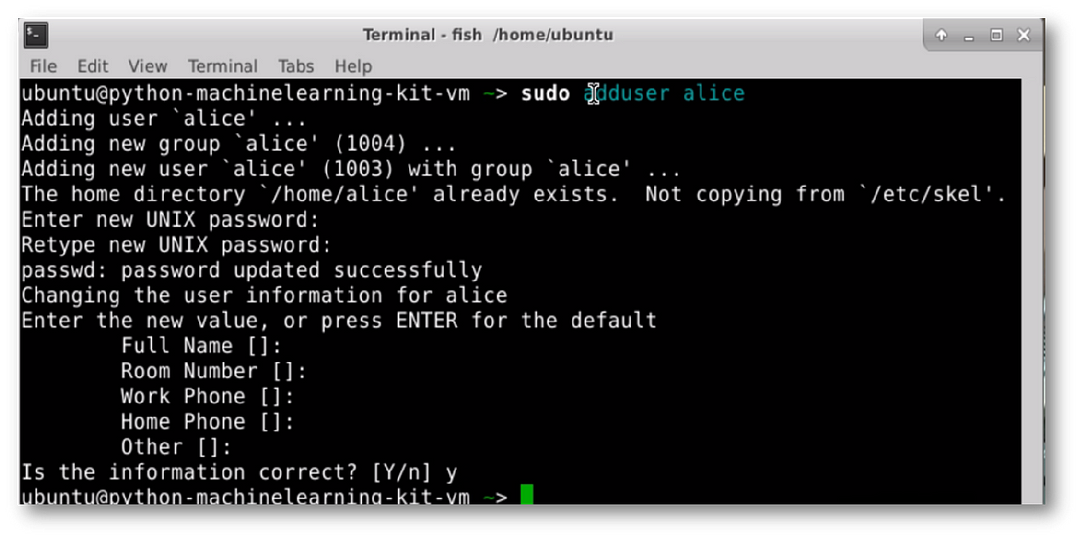
sudo adduser "username"
- Step 2
This will create a new user. The full setup is copied into the home directory of the new user.
- Step 3
Login with a new user.

- Step 4
A new server will spawn for this user which will have a completely separate ipython/jupyter environment from Ubuntu user.
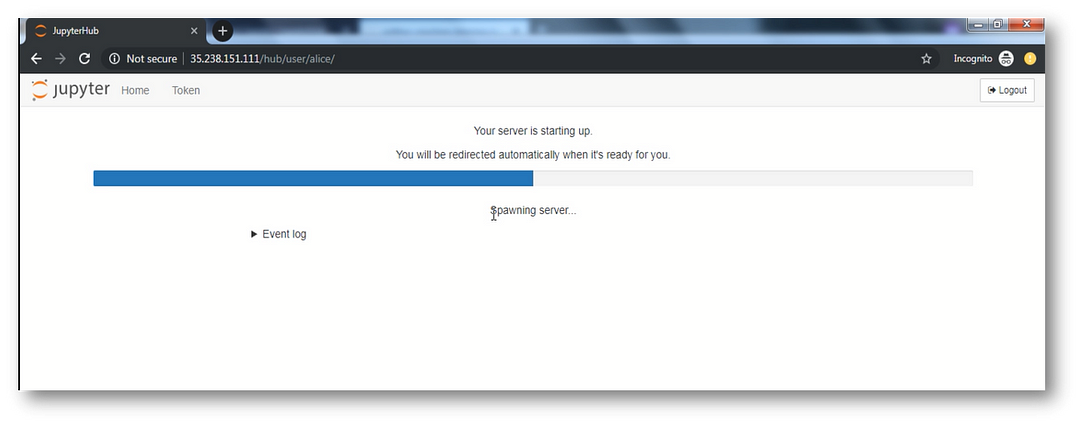
- Step 5
This is a new user homepage.
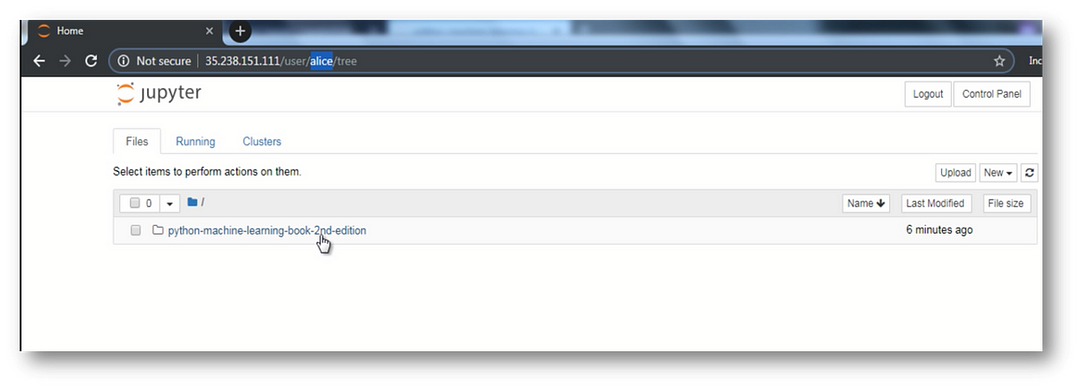
This way Jupyterhub is used to create jupyter/python environment for multiple users. Instead of subscribing to multiple VMs, one can subscribe to a single VM and create multiple users to use the notebook.
It can be used in classes of students, a corporate data science group or a scientific research group.
It is a multi-user Hub that spawns, manages, and proxies multiple instances of the single-user jupyter notebook server.
Conclusion
To sum up, Jupyter Notebook is an interactive computing environment that provides an easy-to-use and versatile platform for data analysis, prototyping, collaboration, and sharing of code and results. It supports multiple programming languages, rich output capabilities, Markdown cells, and integration with popular data science libraries and frameworks, making it an indispensable tool for professionals in various fields.
Setting up Jupyter Notebook on a multiuser environment requires a few simple steps, including logging in as an Ubuntu user, creating a new user, and logging in with that user. Jupyterhub allows multiple users to have completely separate IPython/Jupyter environments on a single VM, making it an efficient and cost-effective solution for classrooms, corporate data science groups, or scientific research groups.
Choosing a GPU-based VM is recommended for training and running AI and machine learning models to avoid performance bottlenecks.


